# Manage cloud projects
Source: https://docs.quake.ai/docs/account/projects
Markdown: https://docs.quake.ai/docs/account/projects.md
---
# Manage cloud projects
New to Quake AI? The [Get started sequence](/docs/quickstart#get-started) in the Quickstart walks creating your first project and picking a tier. This page is the reference for project management in the portal.
A **project** is your isolated cloud workspace. It contains the VMs, networks, storage, and other resources you provision, and it is billed on its own resource tier. You can have multiple projects within one organization, each in a different datacenter region if needed.
1. Go to [{PORTAL_LOGIN_URL}]({PORTAL_LOGIN_URL}) to sign in.
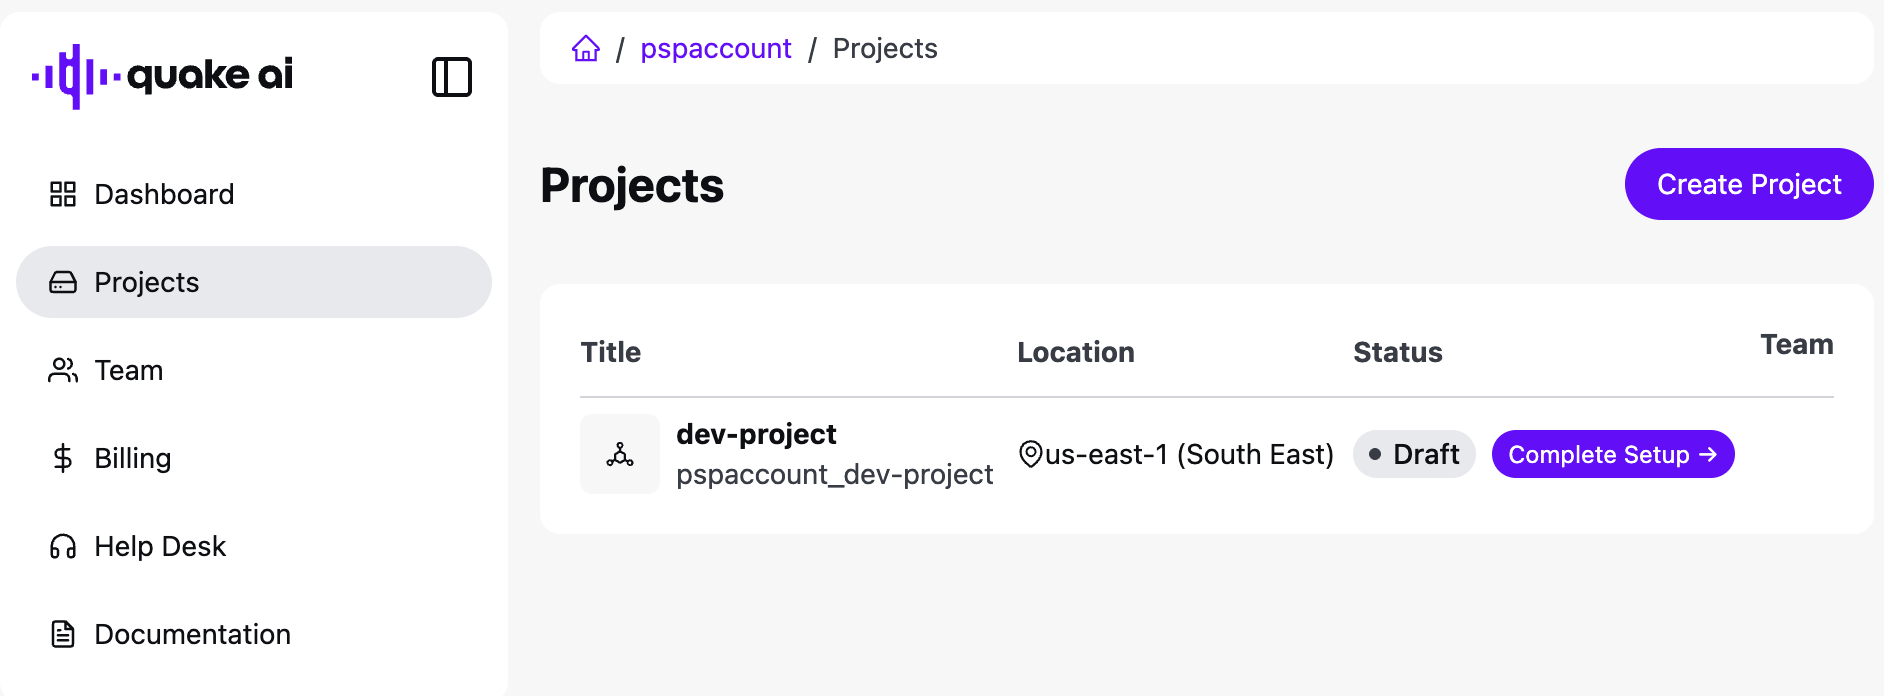
2. Select **Projects** in the left nav, or create a project from **Dashboard**.
See the [Account guide](/docs/account/guide) for organizations, billing, and portal tasks.
## Resource tiers
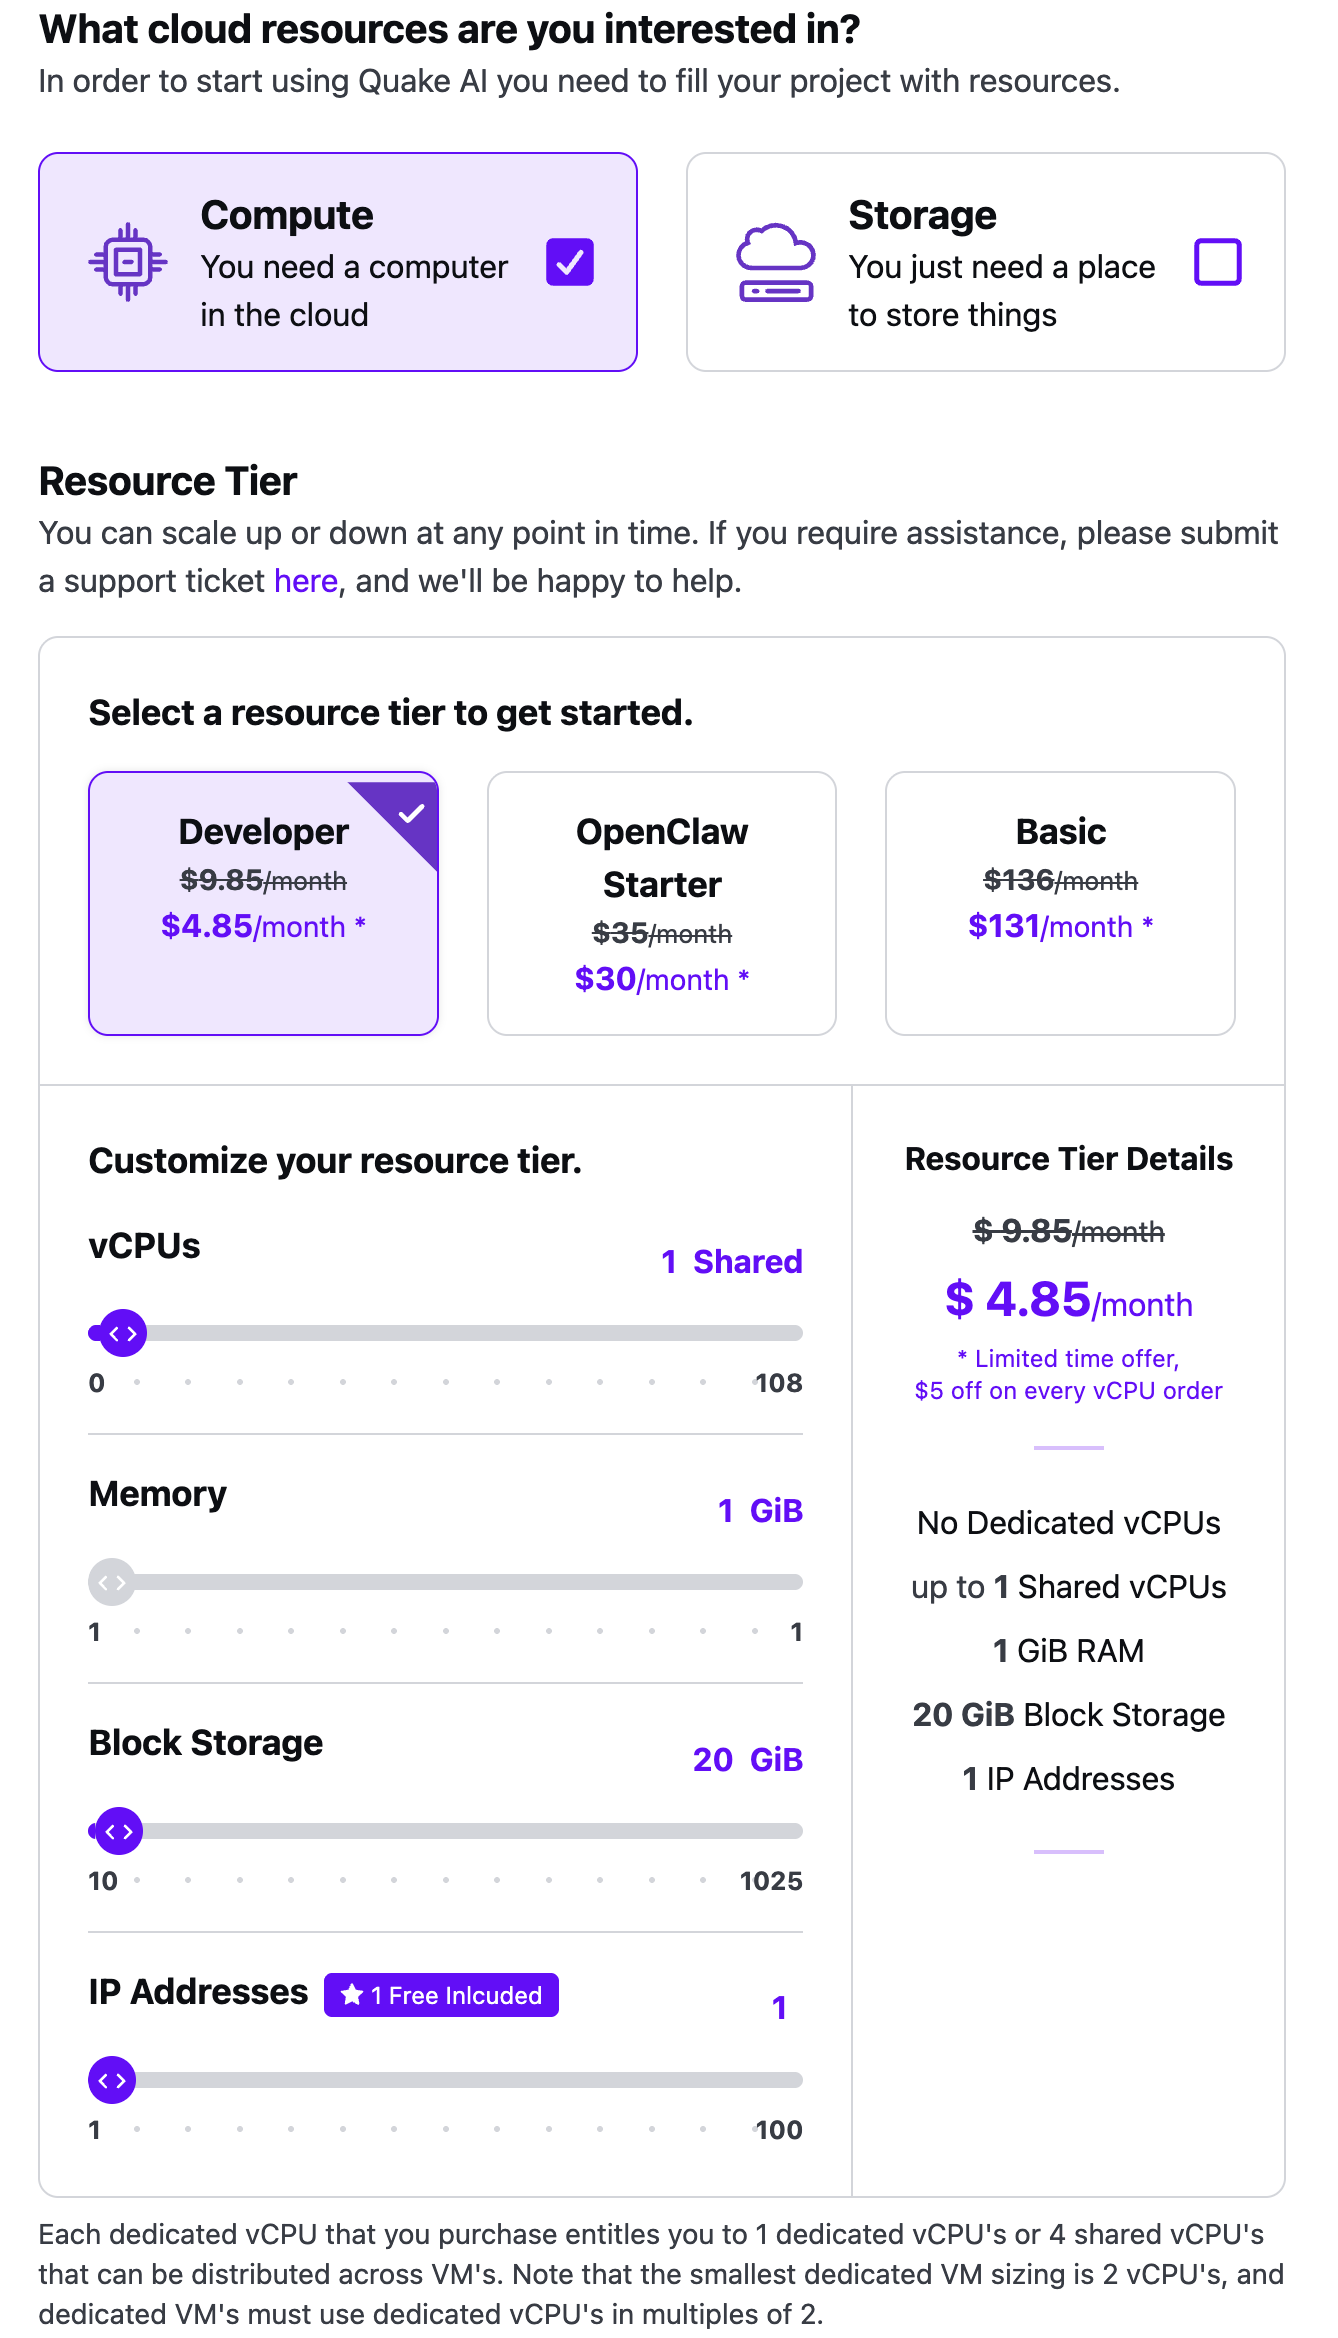
You select a resource tier when you create a project (Compute tile) or when you change an existing project's pack. Tiers bundle vCPUs, memory, and block storage into a monthly subscription. See [Resource tiers](/docs/account/resource-tiers) for included capacity. Current prices render from the validated dataset on the [pricing reference](/docs/account/billing/pricing).
## Create a project
1. Select **Projects**, then **Create Project** (or **Create Project** on the dashboard).
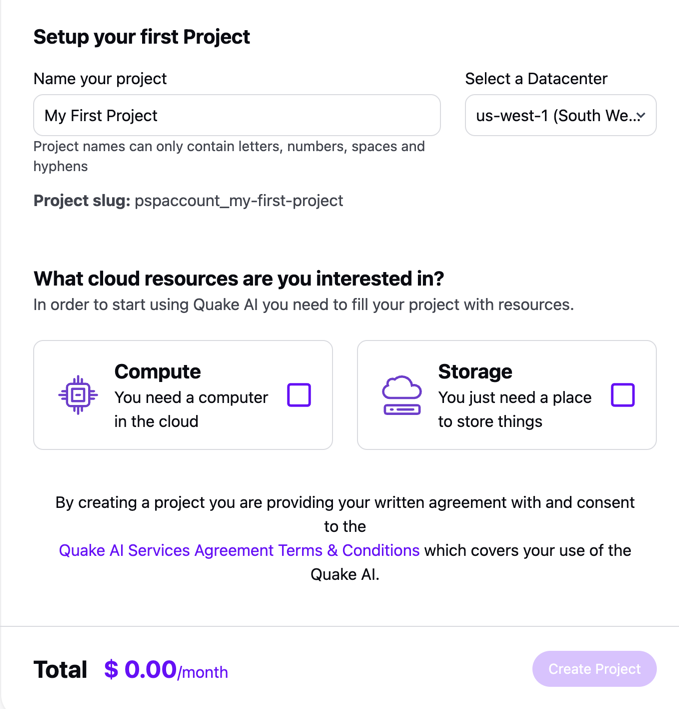
2. Provide a project name. Names may contain letters, numbers, spaces, and hyphens. You cannot change the name after you create the project.
3. Select the datacenter region closest to you or your users.
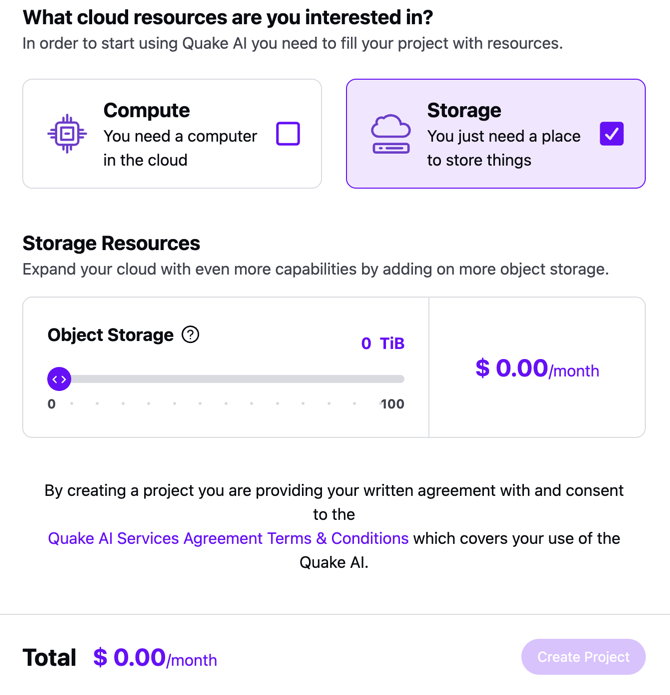
4. Select **Compute** if you need instances, **Storage** if you need object storage, or both.
5. If you selected Compute, pick **Developer**, **OpenClaw Starter**, or **Basic**, then adjust sliders the wizard allows.
6. If you selected Storage, set the object storage amount with the slider.
7. Review the monthly total and select **Create Project**.
Add payment methods and billing addresses on **Billing**. See [Manage your subscription](/docs/account/billing/manage-subscription).
## Manage a project
1. Select **Projects**.
2. Select the project row to open its details.
## Add team members to a project
1. Select **Projects**, then the project.
2. Under **Project Members**, select **Add Members**.
3. Assign a **project role** for the team member:
- **Project Reader**: read-only access to compute resources (VMs, networks, routers, and volumes)
- **VM Admin**: full read-write access to compute resources
- **Object Storage Admin**: full read-write access to object storage
- **Project Admin**: full read-write access to compute and object storage
Invite the person to the organization first. See [Add members to your team](/docs/account/guide#add-members-to-your-team).
## Open my cloud project
1. Select **Projects**, then the project.
2. Select **Open Cloud Project**.
3. A new browser window opens the console for that project. You are signed in with your Rumble.com identity.
## Upgrade or downgrade resource tiers
1. Select **Projects**, then the project.
2. Select the resource tier you need.
3. Optionally add vCPUs, memory, block storage, object storage, or public IPv4 addresses.
4. Confirm the change from the project page.
## Pause your resource tier
You can keep your account active and pause the project's billed resources. Contact **support.cloud@rumble.com** if you need to delete the account.
Delete provisioned VMs, networks, routers, storage, and other cloud components before you pause the resource tier.
1. Select **Projects**, then the project.
2. In **Customize your resource tier**, reduce vCPUs, memory, block storage, and object storage to 0.
3. Confirm the change.
4. Open **Billing** and **Subscriptions** to confirm the subscription no longer bills those resources.
## Related reading
* [Your account](/docs/account/guide)
* [Resource tiers](/docs/account/resource-tiers)
* [Subscriptions](/docs/account/subscriptions)
* [Dashboard](/docs/account/dashboard)
Glossary: [*Projects*](/docs/glossary#project).