Deploy OpenClaw on Quake AI
Deploy OpenClaw on Quake AI
This guide walks you through deploying OpenClaw, the open-source AI agent framework with 337,000+ GitHub stars, on Quake AI using the Console Apps installer. You deploy OpenClaw by connecting to a new VM over SSH and running openclaw onboard.
OpenClaw connects AI models (GPT-5, Claude, Gemini, DeepSeek, local models via Ollama) to the messaging platforms you already use: Telegram, Discord, Slack, Signal, Microsoft Teams, and more. Running OpenClaw on your own Quake AI VM gives you full control over your data, 24/7 uptime, and the flexibility to choose any AI model provider.
What gets deployed#
The Console Apps installer provisions:
- 1 VM running a pre-built OpenClaw image (Ubuntu with OpenClaw, nginx, and sslip.io TLS pre-installed)
- HTTPS web interface with auto-generated username and password
- SSH access as the
openclawuser - Floating IP for external access (auto-allocated)
- Security group configured for SSH (22), HTTP (80), and HTTPS (443)
- 25 GiB disk (default, expandable via Advanced Options)
- Interactive onboarding via
openclaw onboard: configures your AI provider, messaging platforms, and agent personality
Prerequisites#
- A Quake AI account with at least one project. If you have not created an account, sign up at rumble.cloud.
- An API key from at least one AI model provider (OpenAI, Anthropic, Google, DeepSeek, or OpenRouter for access to multiple providers with a single key)
Recommended instance sizes#
| Use case | Flavor | vCPU | RAM | Notes |
|---|---|---|---|---|
| Getting started / personal | s1a.medium (default) | 4 shared | 4 GiB | Handles typical conversation volume for a single user |
| Team / multi-platform / skills | m2a.xlarge (select via Advanced Options) | 4 dedicated | 16 GiB | Recommended if running multiple skills or heavy browser automation |
OpenClaw requires a minimum of 2 GiB RAM for builds and 1 GiB at runtime.
Install OpenClaw#
Step 1: Create your account and project#
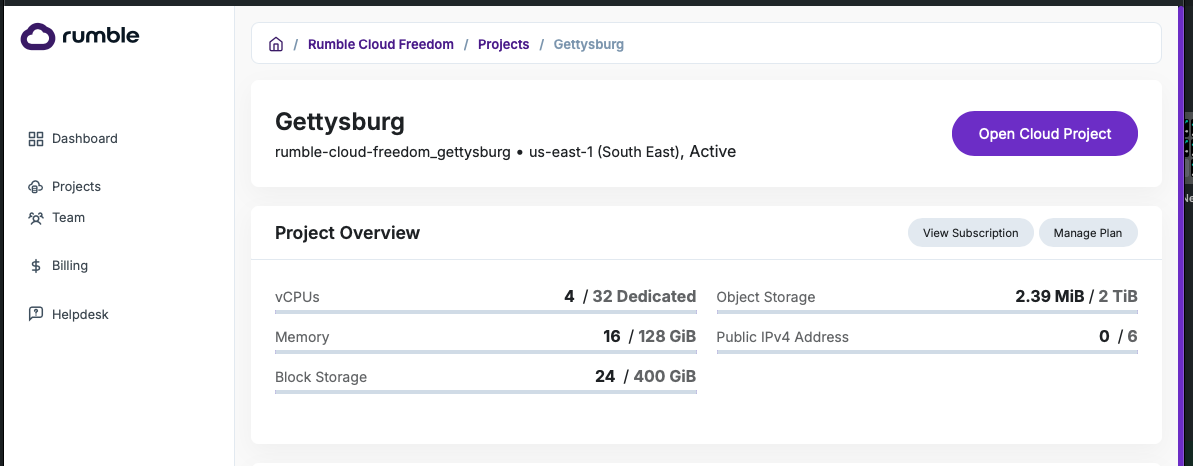
Log in to your account in the Console and select the project where you want to install OpenClaw.
 Click to zoom
Step 2: navigate to apps#
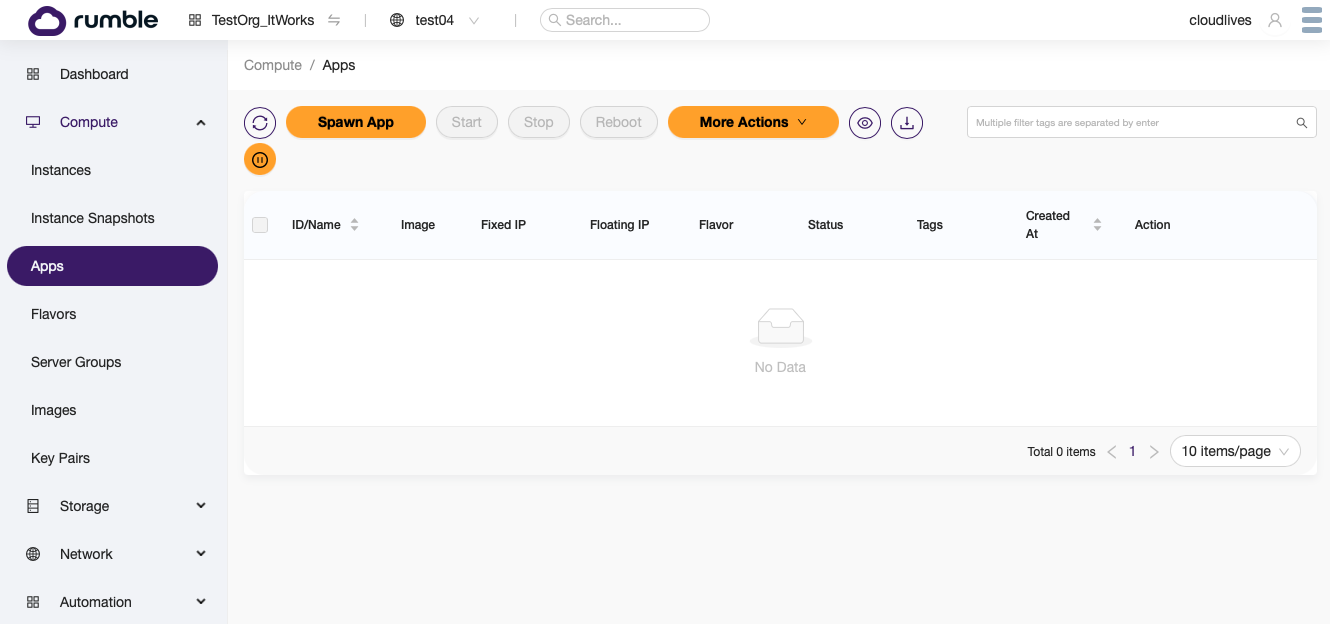
From the Console, go to Compute > Apps and click Spawn App.
 Click to zoom
Step 3: Configure the app#
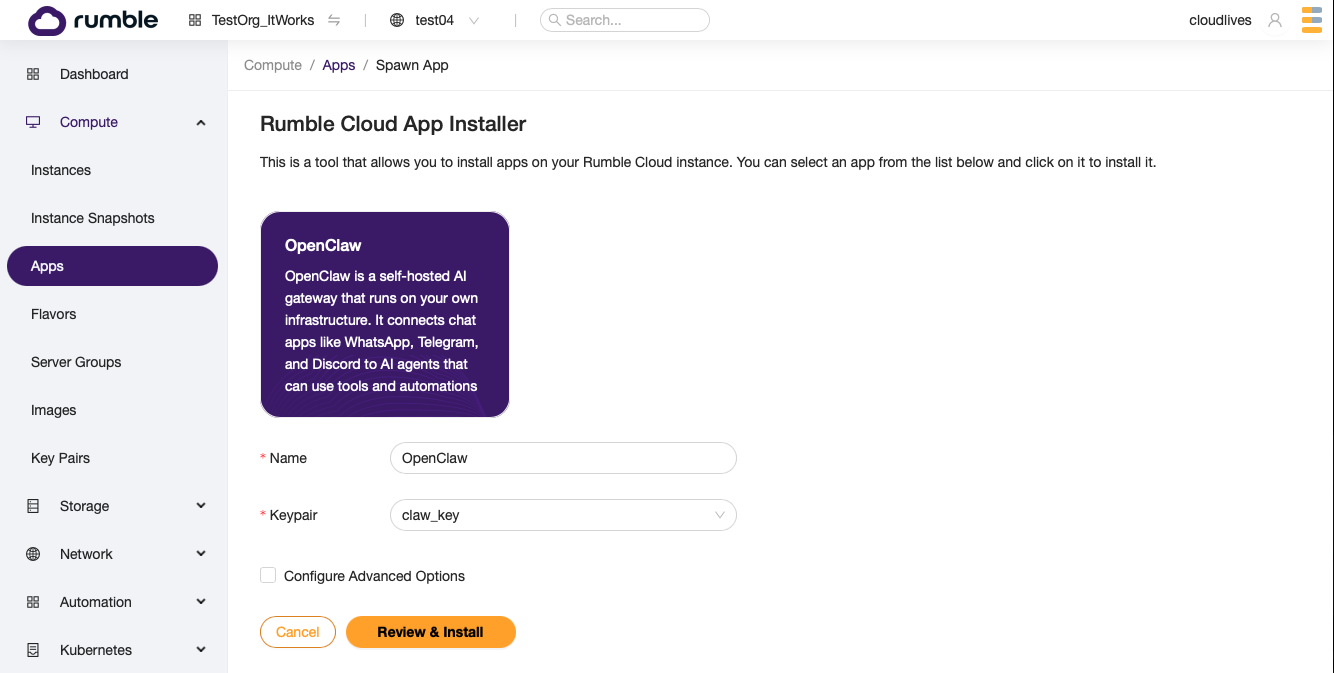
Select the OpenClaw app. Assign it a name and select a keypair for SSH login. If you have not created a keypair, one is created for you automatically during the installation.
The default installation uses the s1a.medium flavor (4 shared vCPU, 4 GiB RAM) with 25 GiB disk and a web server for remote access. To customize the flavor, disk size, or other options, check Configure Advanced Options.
 Click to zoom
Step 4: Review and install#
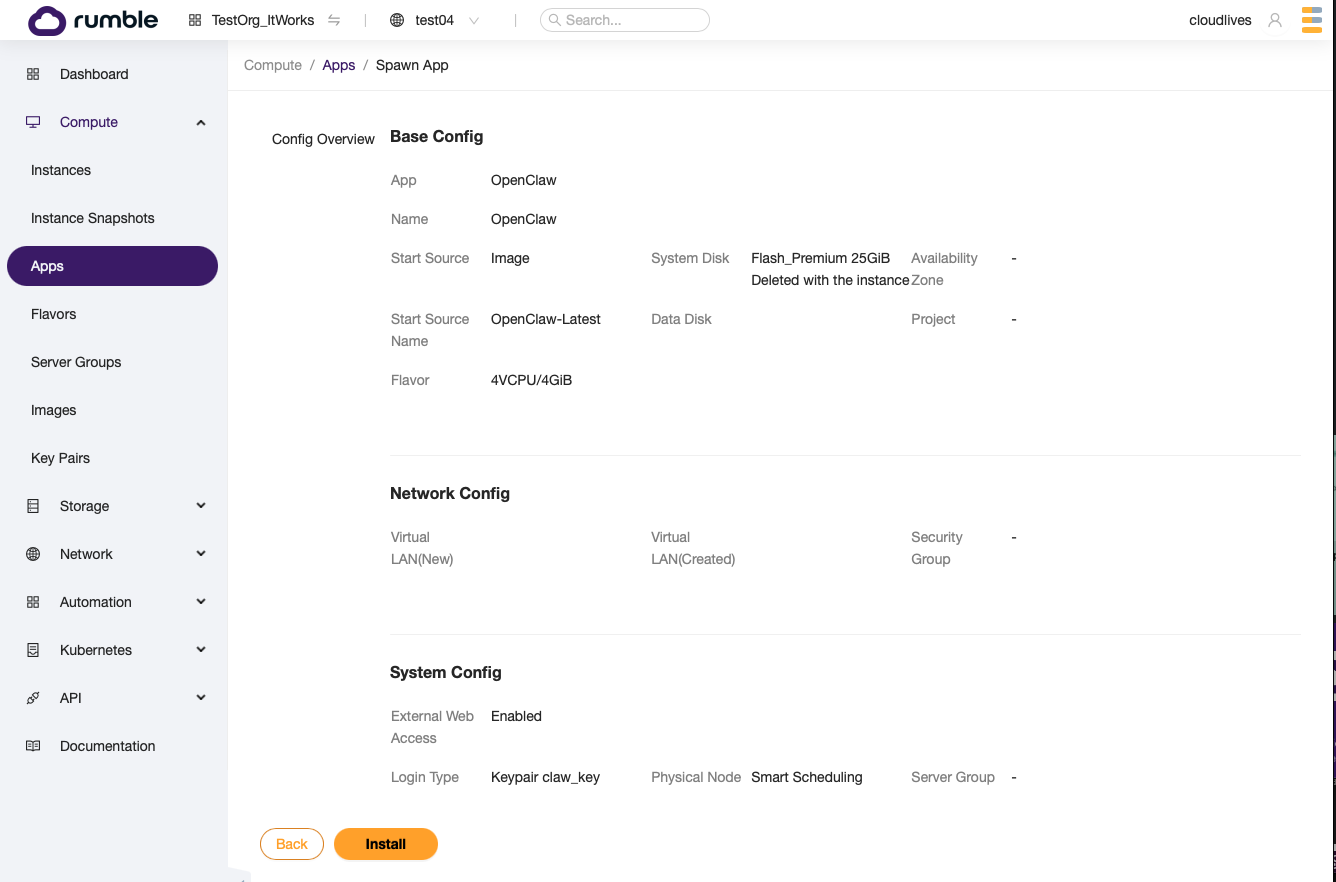
Review your selections and press Install.
 Click to zoom
Step 5: Wait for the instance to become active#
The Console redirects to the app page for your new OpenClaw VM. This page includes a summary of the basic steps to complete your installation, as well as the IP address and web URL.
The IP address is blank and the status shows Build when you first arrive. Refresh the page as the build progresses.
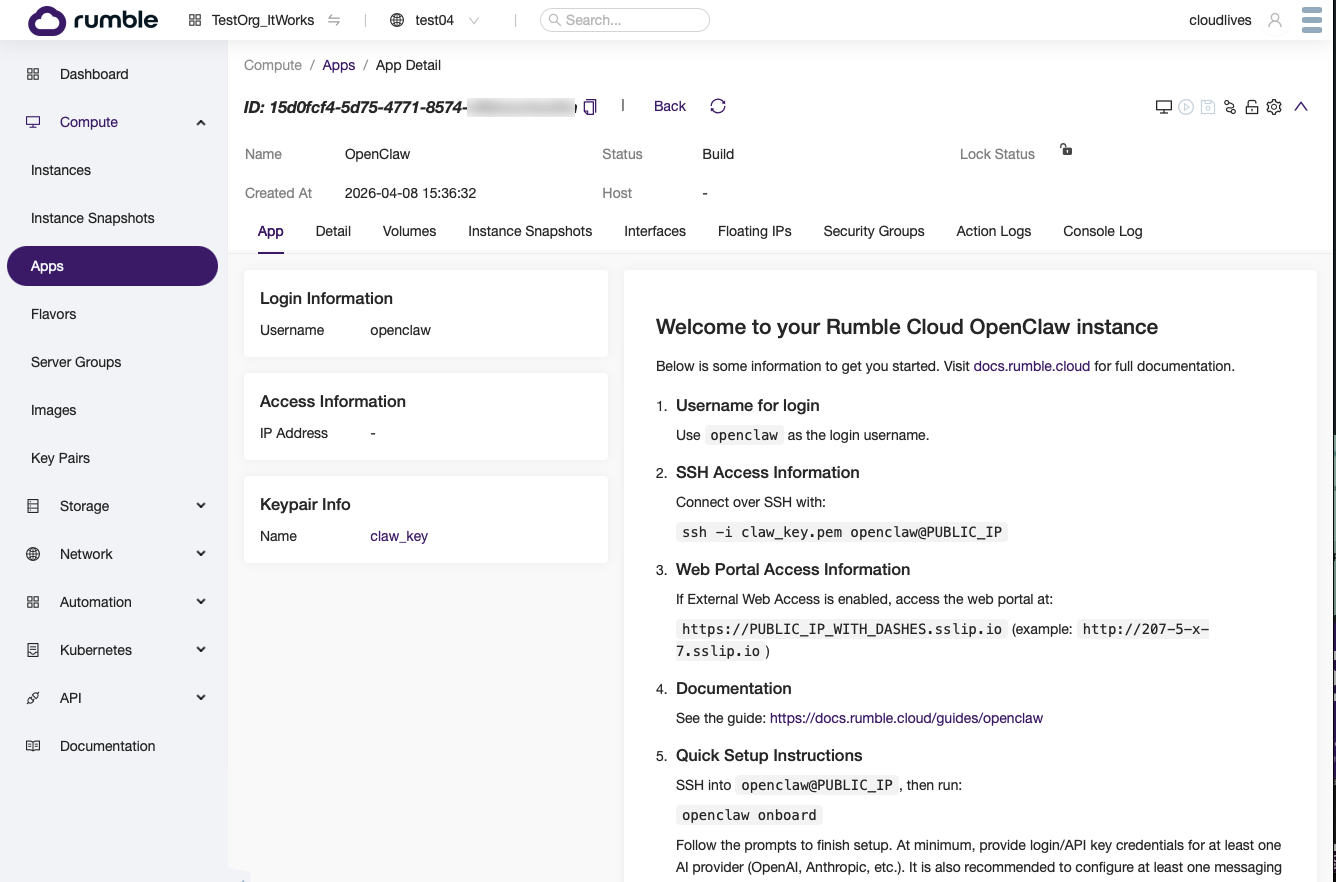 Click to zoom
After refreshing, you should see the status switch to Active and an IP address assigned.
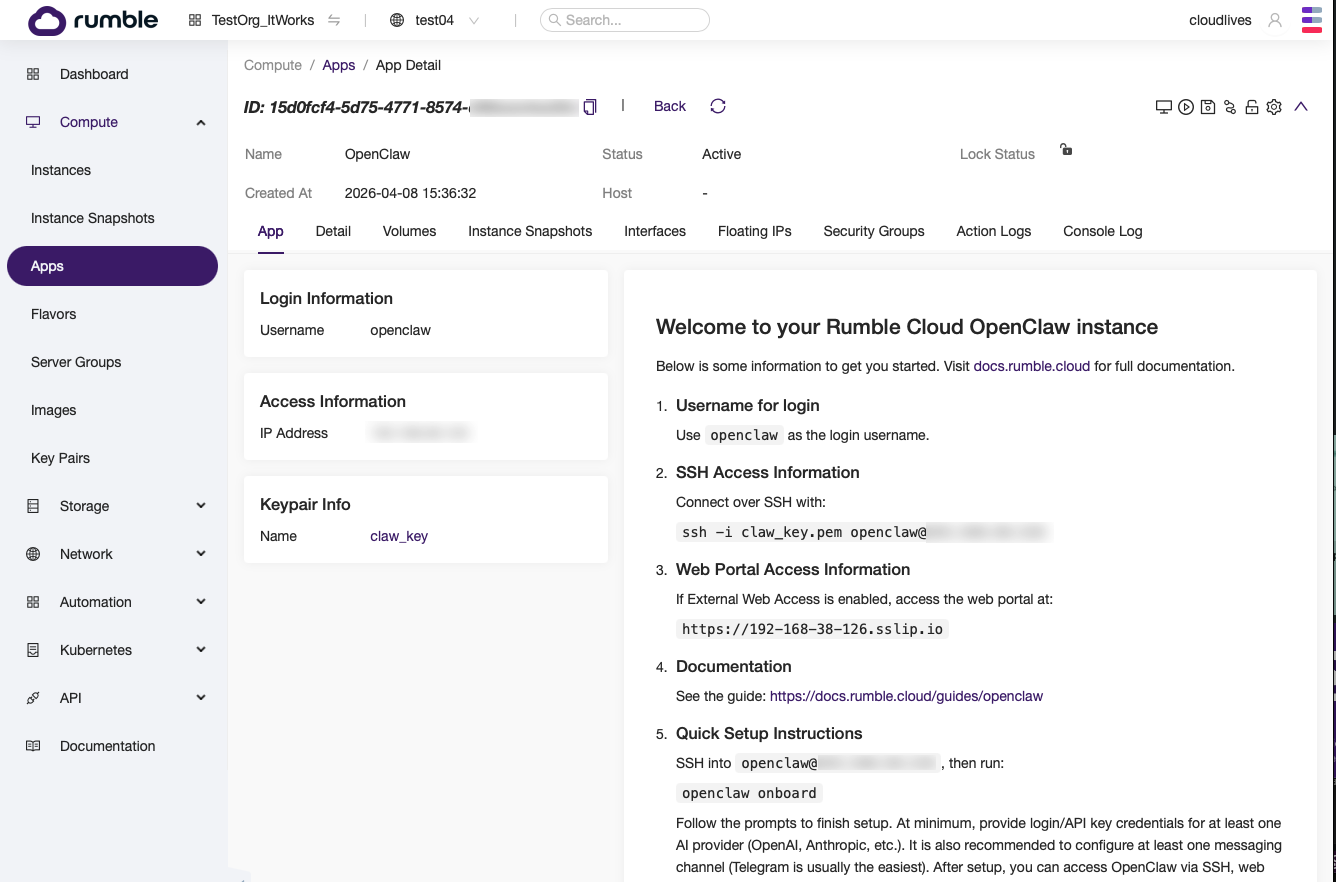 Click to zoom
Step 6: SSH into the VM#
Using the SSH keypair you assigned (or the one that was auto-generated), log in to the new VM as the openclaw user:
ssh -i YOUR_SSH_PRIVATE_KEY.pem openclaw@YOUR_FLOATING_IPOn Windows, use an SSH client such as PuTTY.
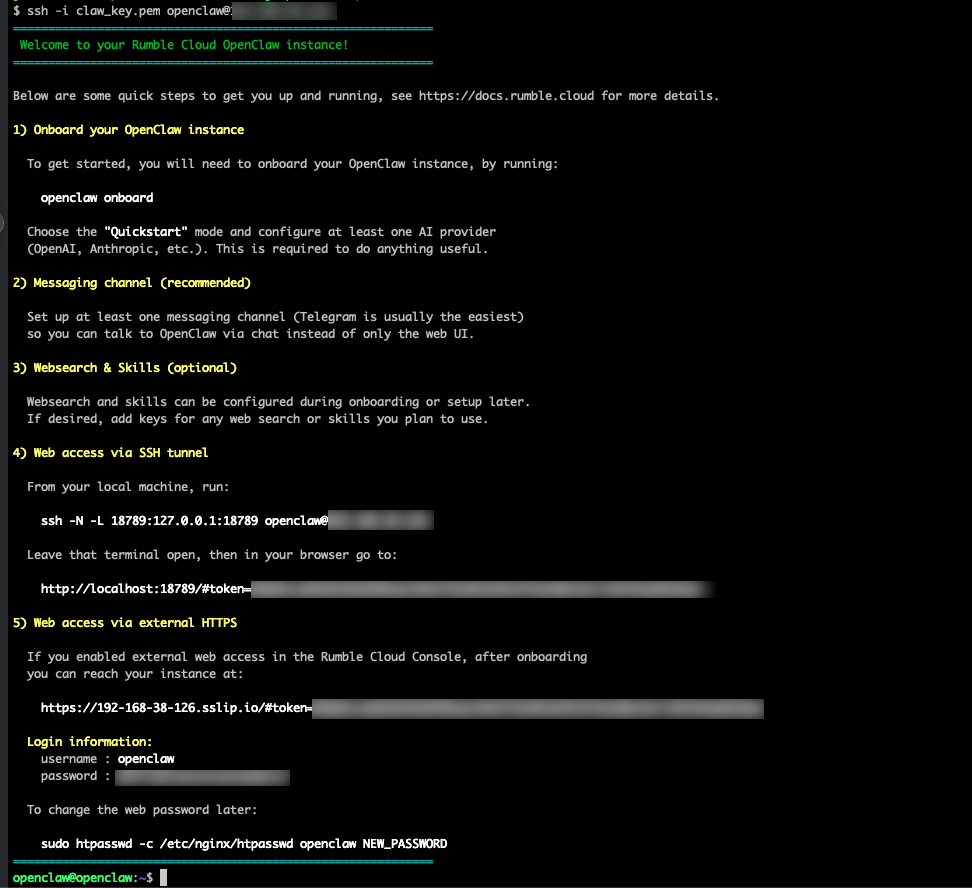
After connecting, you see an introduction message with setup instructions, your web access URL, and login credentials.
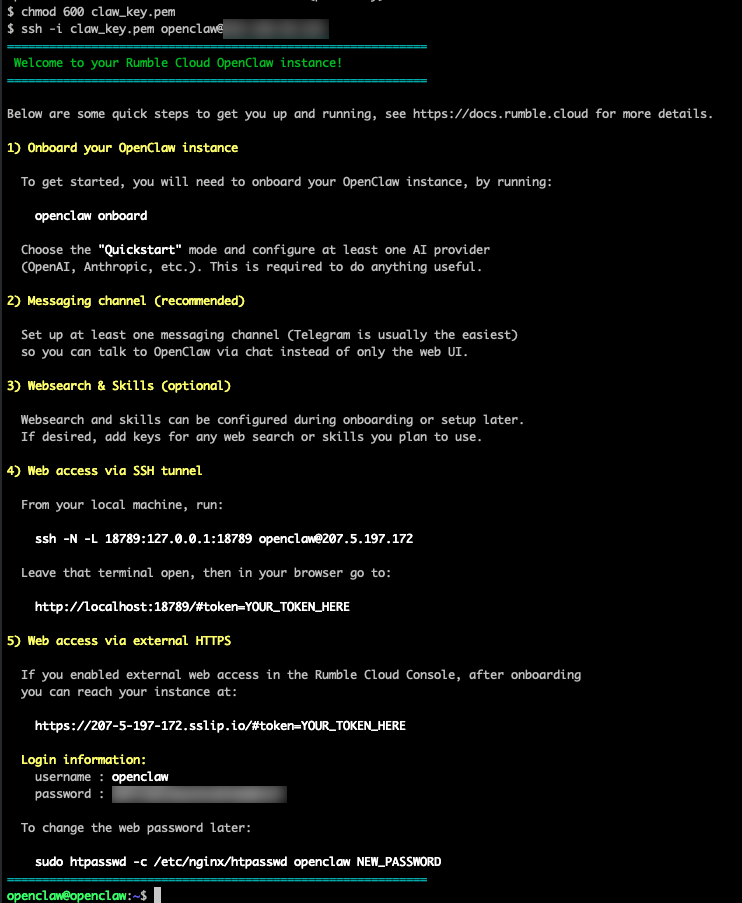 Click to zoom
Configure OpenClaw#
Step 7: Run the onboarding wizard#
Run openclaw onboard from the console. The wizard can take 10-30 seconds before the security banner appears.
Step 8: Accept the security notice#
Once the command starts, you see a banner with a security warning. Read the warning, select Yes with the arrow keys, and press Enter.
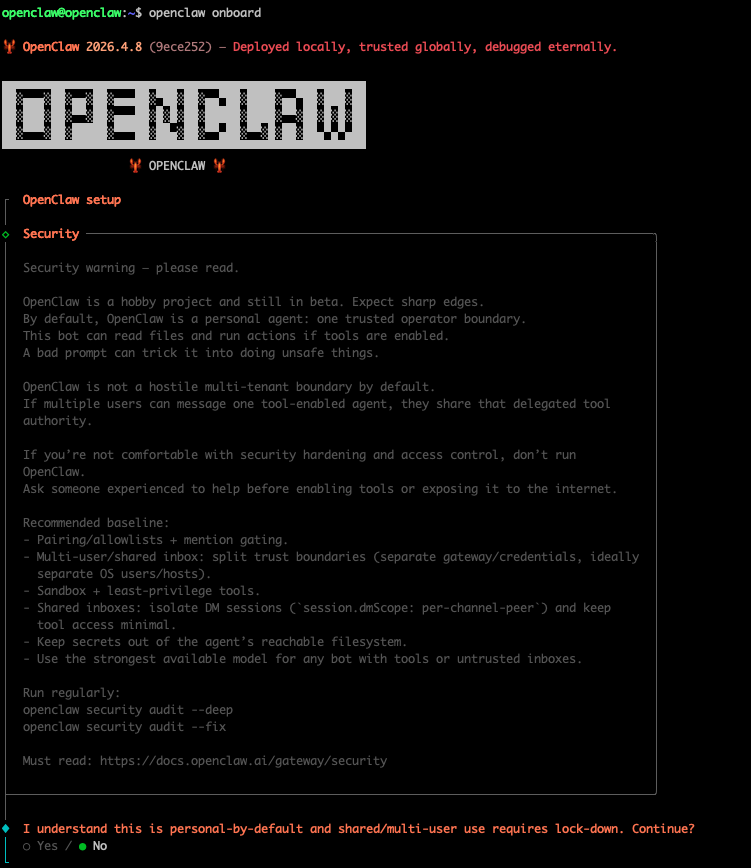 Click to zoom
Step 9: select QuickStart#
Select the QuickStart setup mode and press Enter.
 Click to zoom
Step 10: Config handling#
Some settings are pre-configured in the image. If prompted about Config Handling, select Use Existing Values.
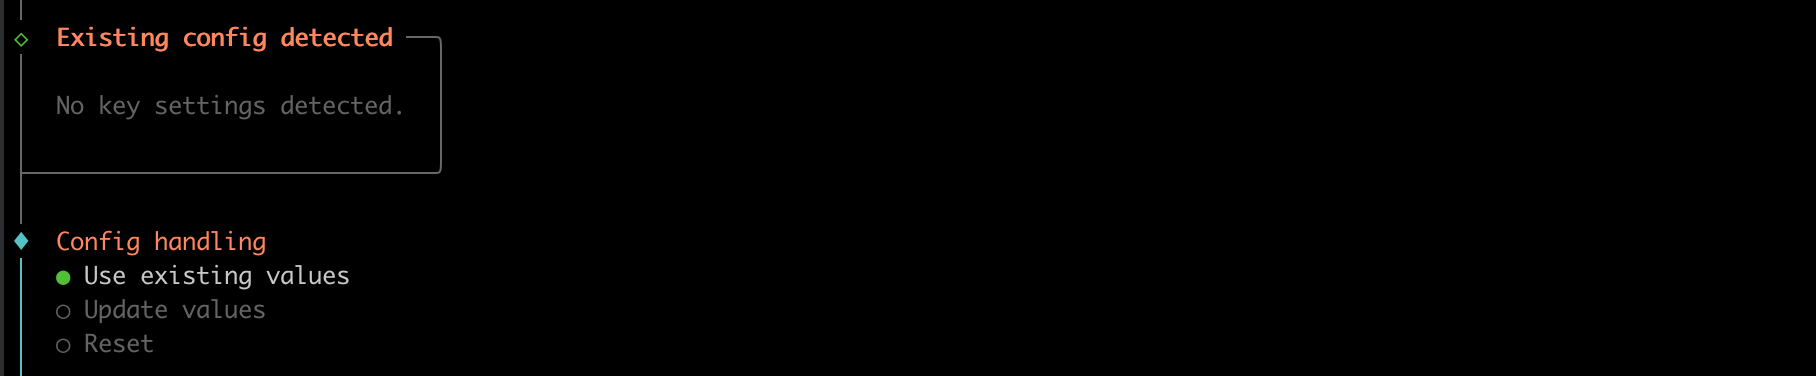 Click to zoom
Step 11: Select your AI provider#
Select one model / auth provider. This guide uses OpenAI as an example, but any provider works.
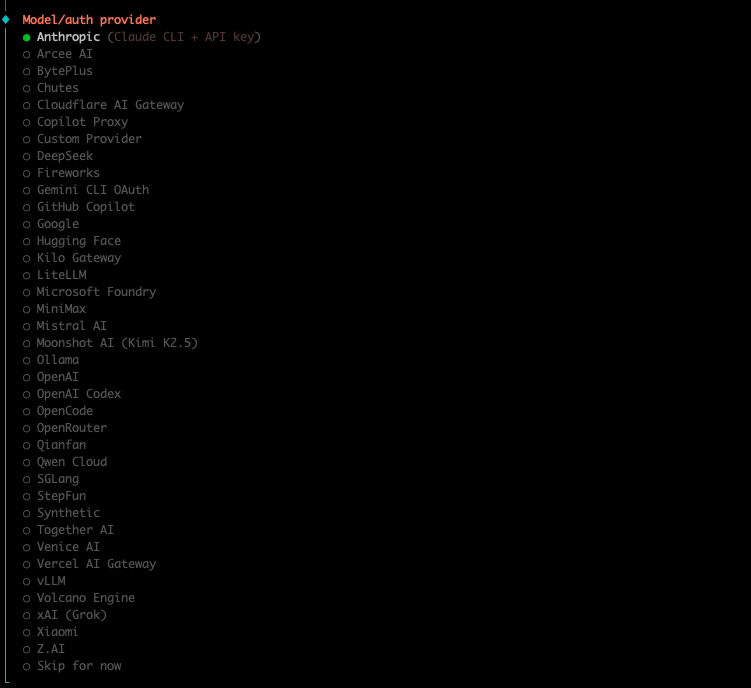 Click to zoom
 Click to zoom
Step 12: Select your model#
Choose your preferred model. If you do not have a preference, accept the default.
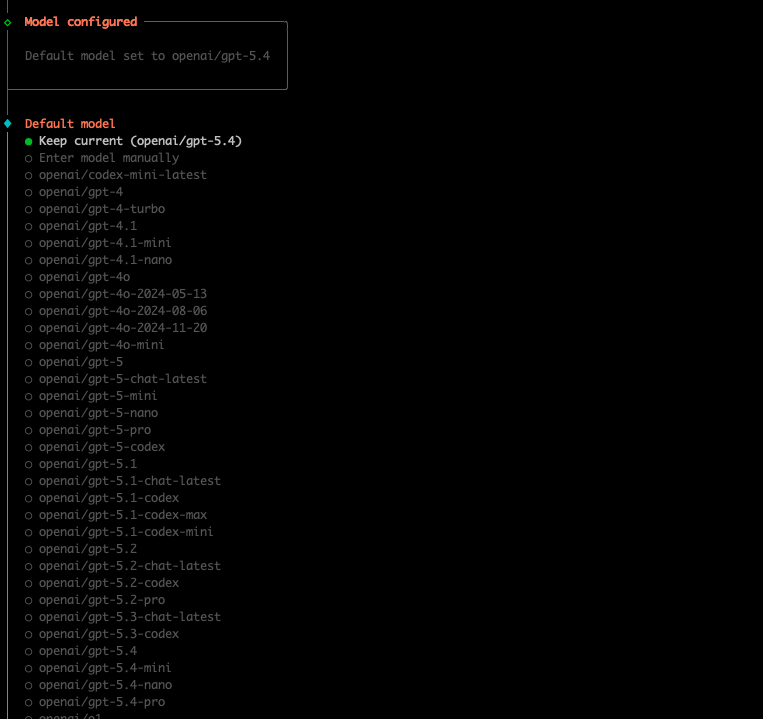 Click to zoom
Step 13: Enter your API key#
Enter the API key for your chosen provider when prompted.
Step 14: Set up a messaging platform (optional)#
You can connect a messaging platform to control your OpenClaw from your phone. For the easiest setup, select Telegram. Select Skip for now if you want to configure messaging later.
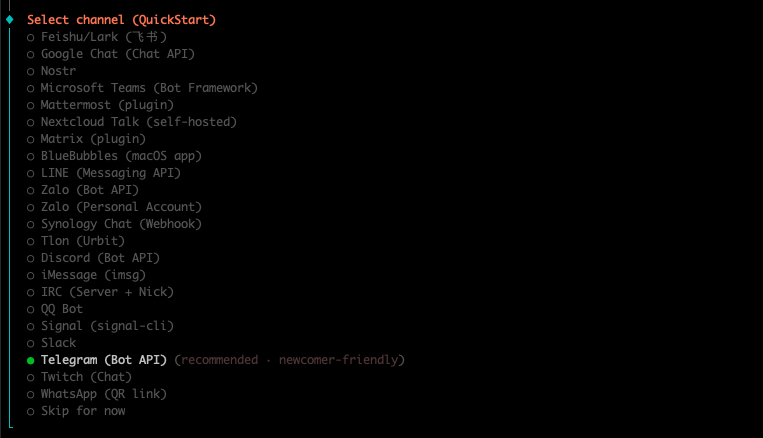 Click to zoom
If you selected Telegram, the wizard prompts for a bot API key. Leave the wizard waiting and follow the steps below.
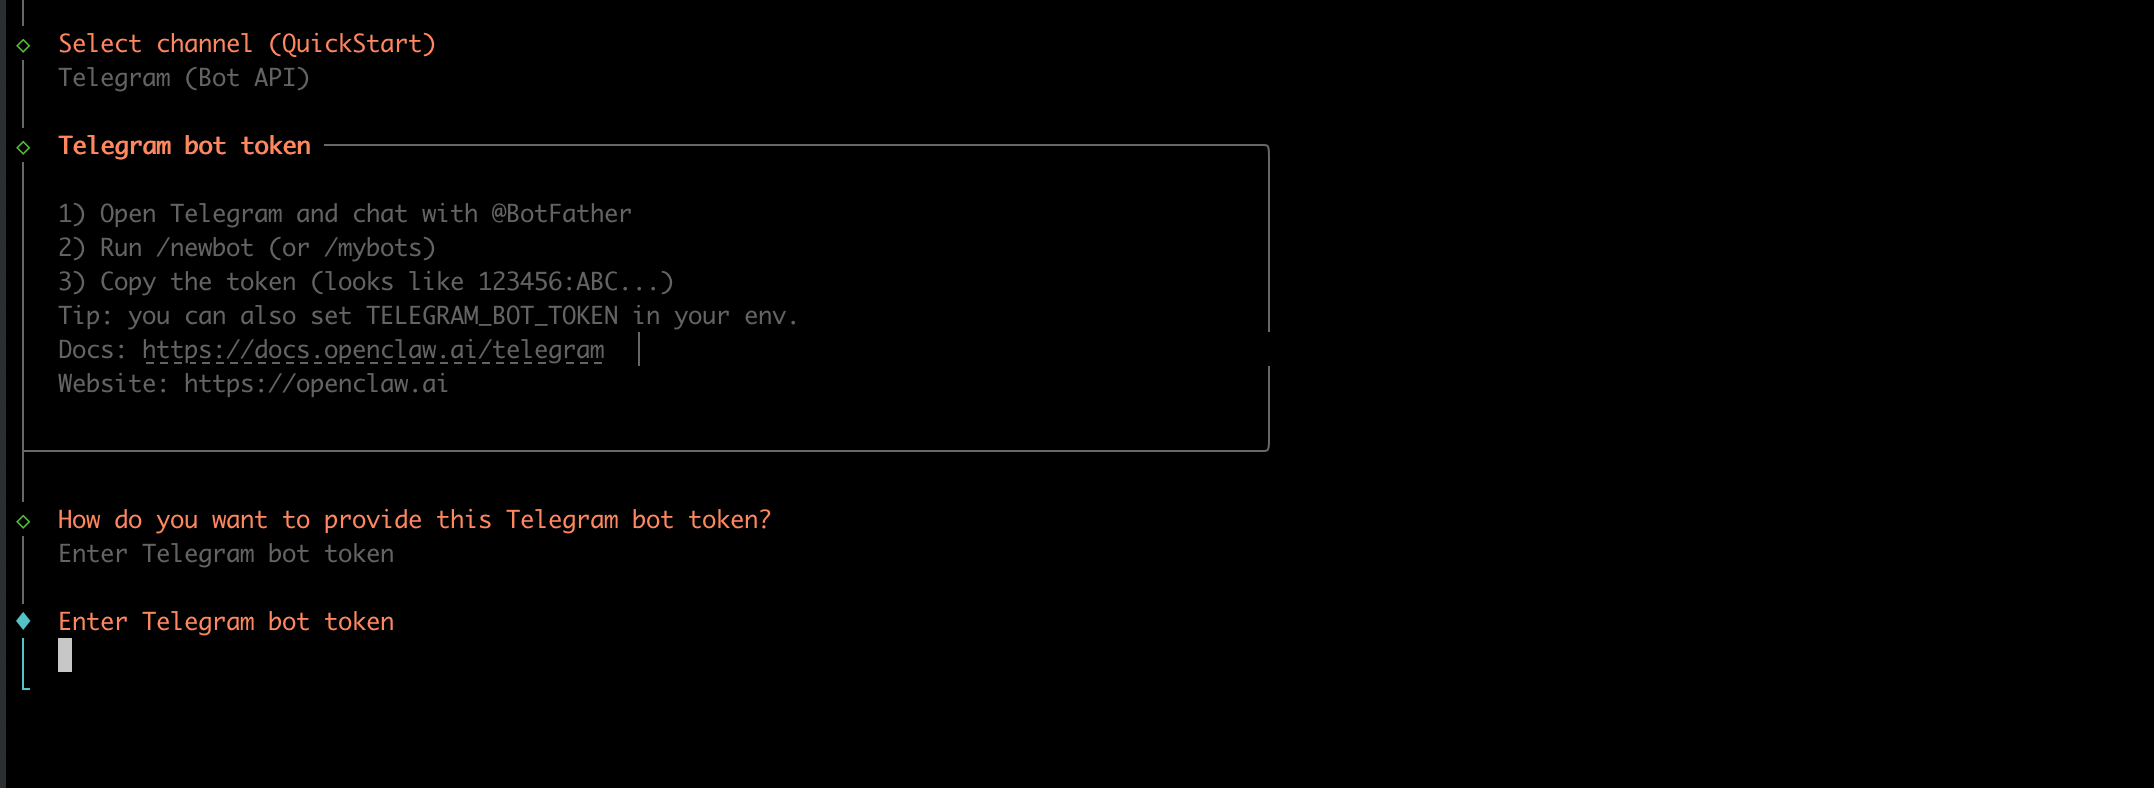 Click to zoom
Create a telegram bot#
- Download Telegram on your phone and create an account if you do not have one. Send "Help" to @BotFather.
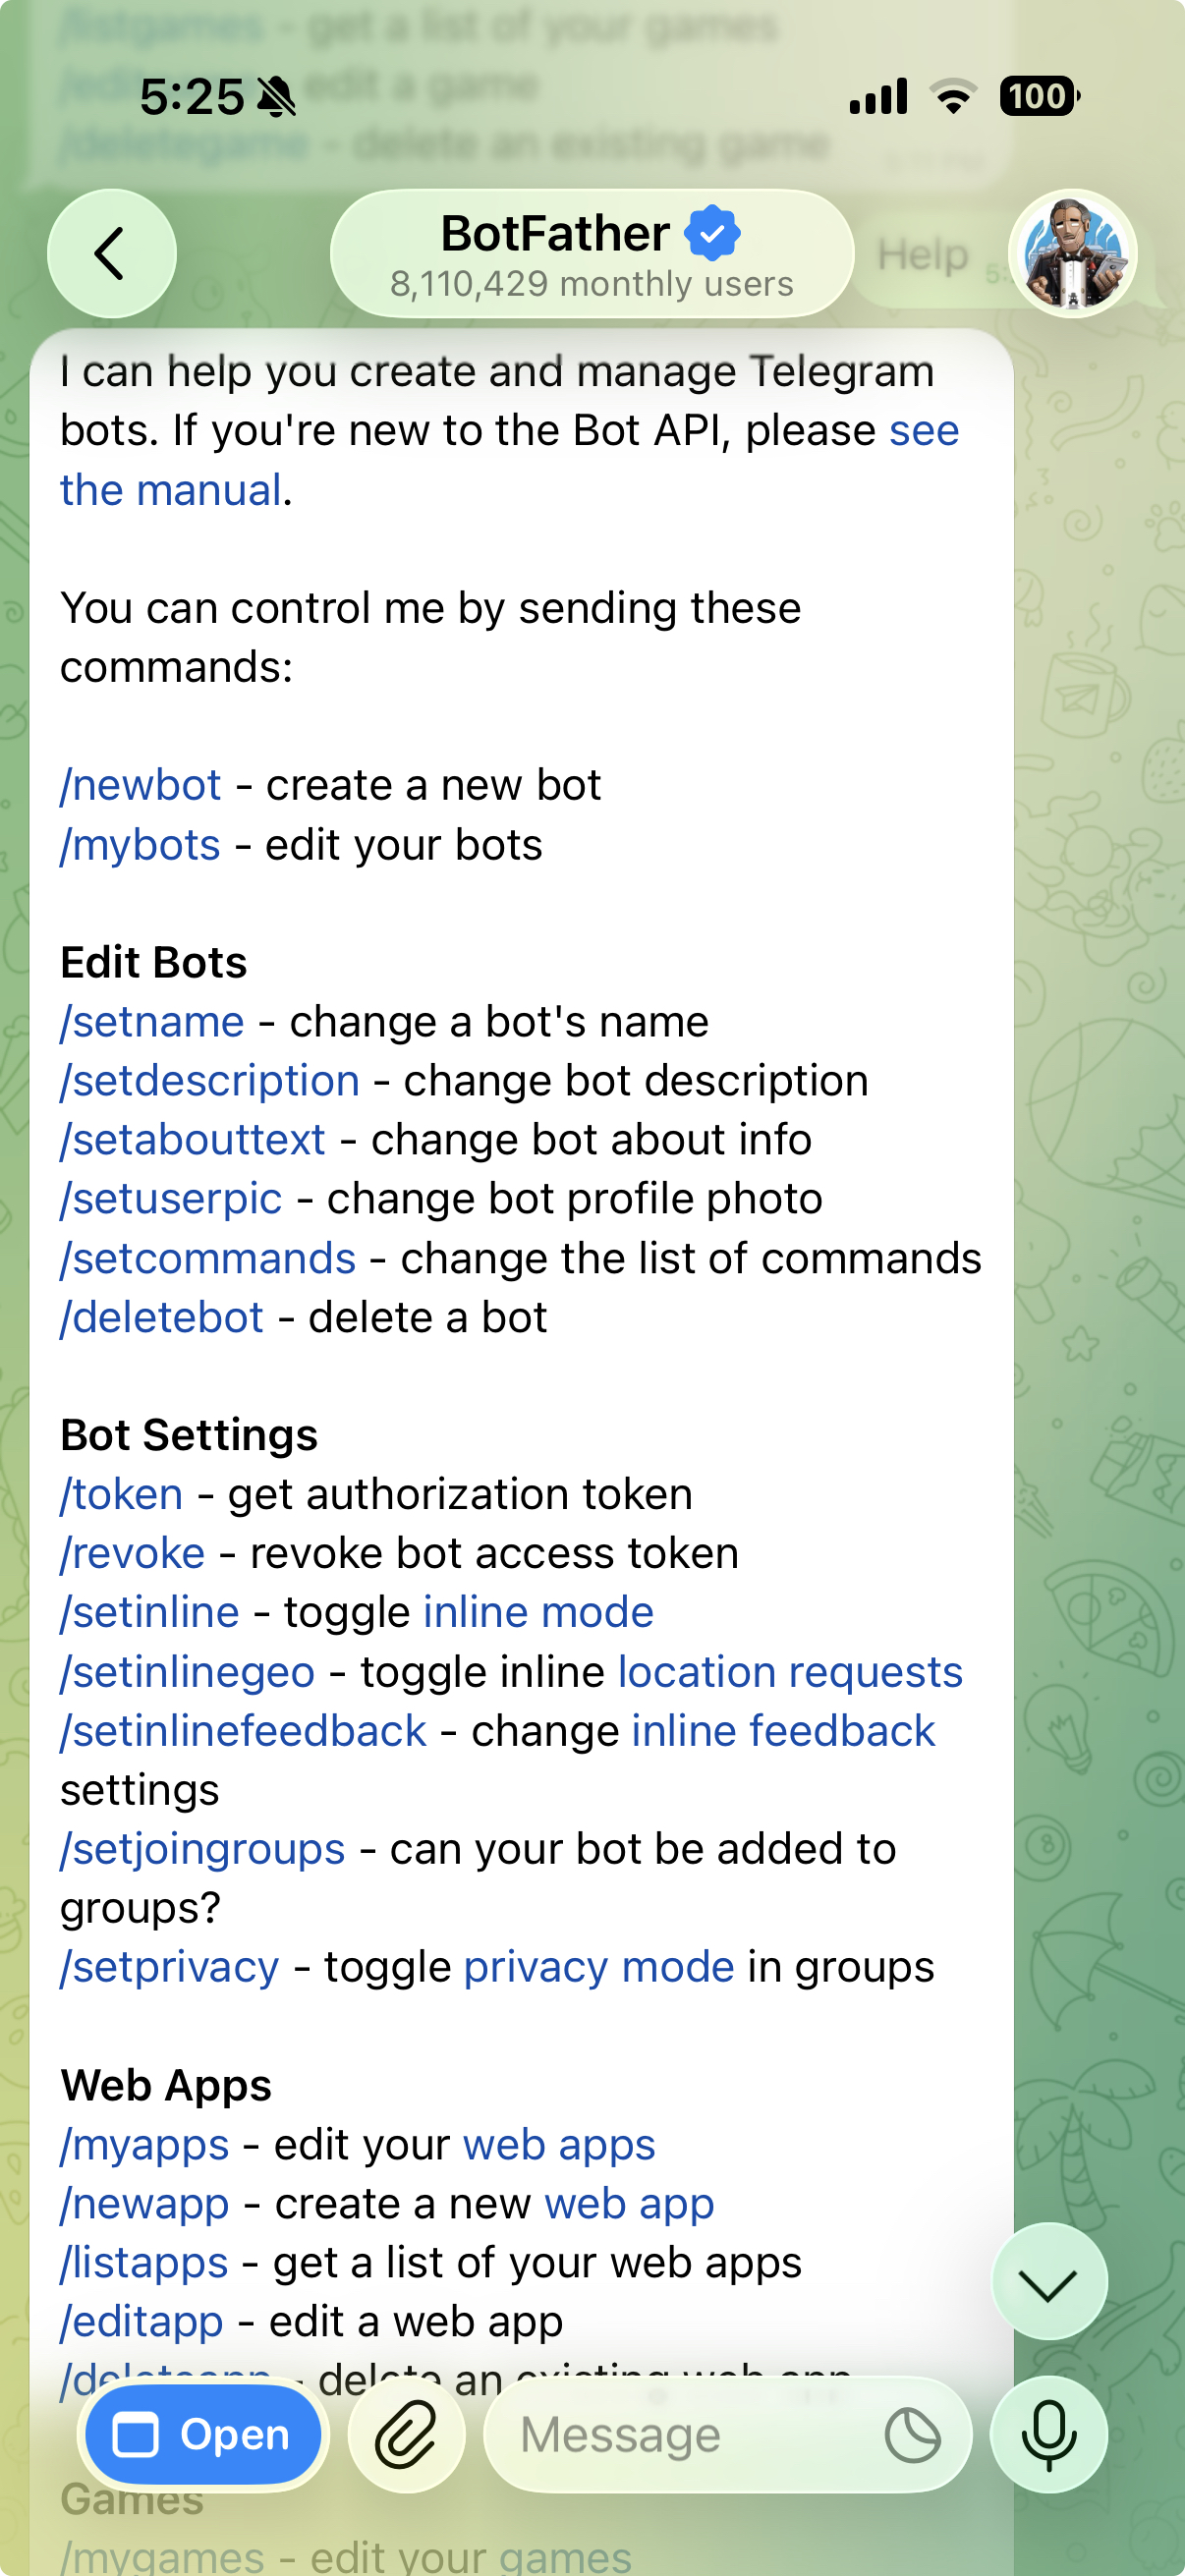 Click to zoom
- Send
/newbot. BotFather asks for a display name (for example,Quake AI OpenClaw) and then a username that ends inbot(for example,QuakeOpenClawDemoBot). BotFather replies with an API key.
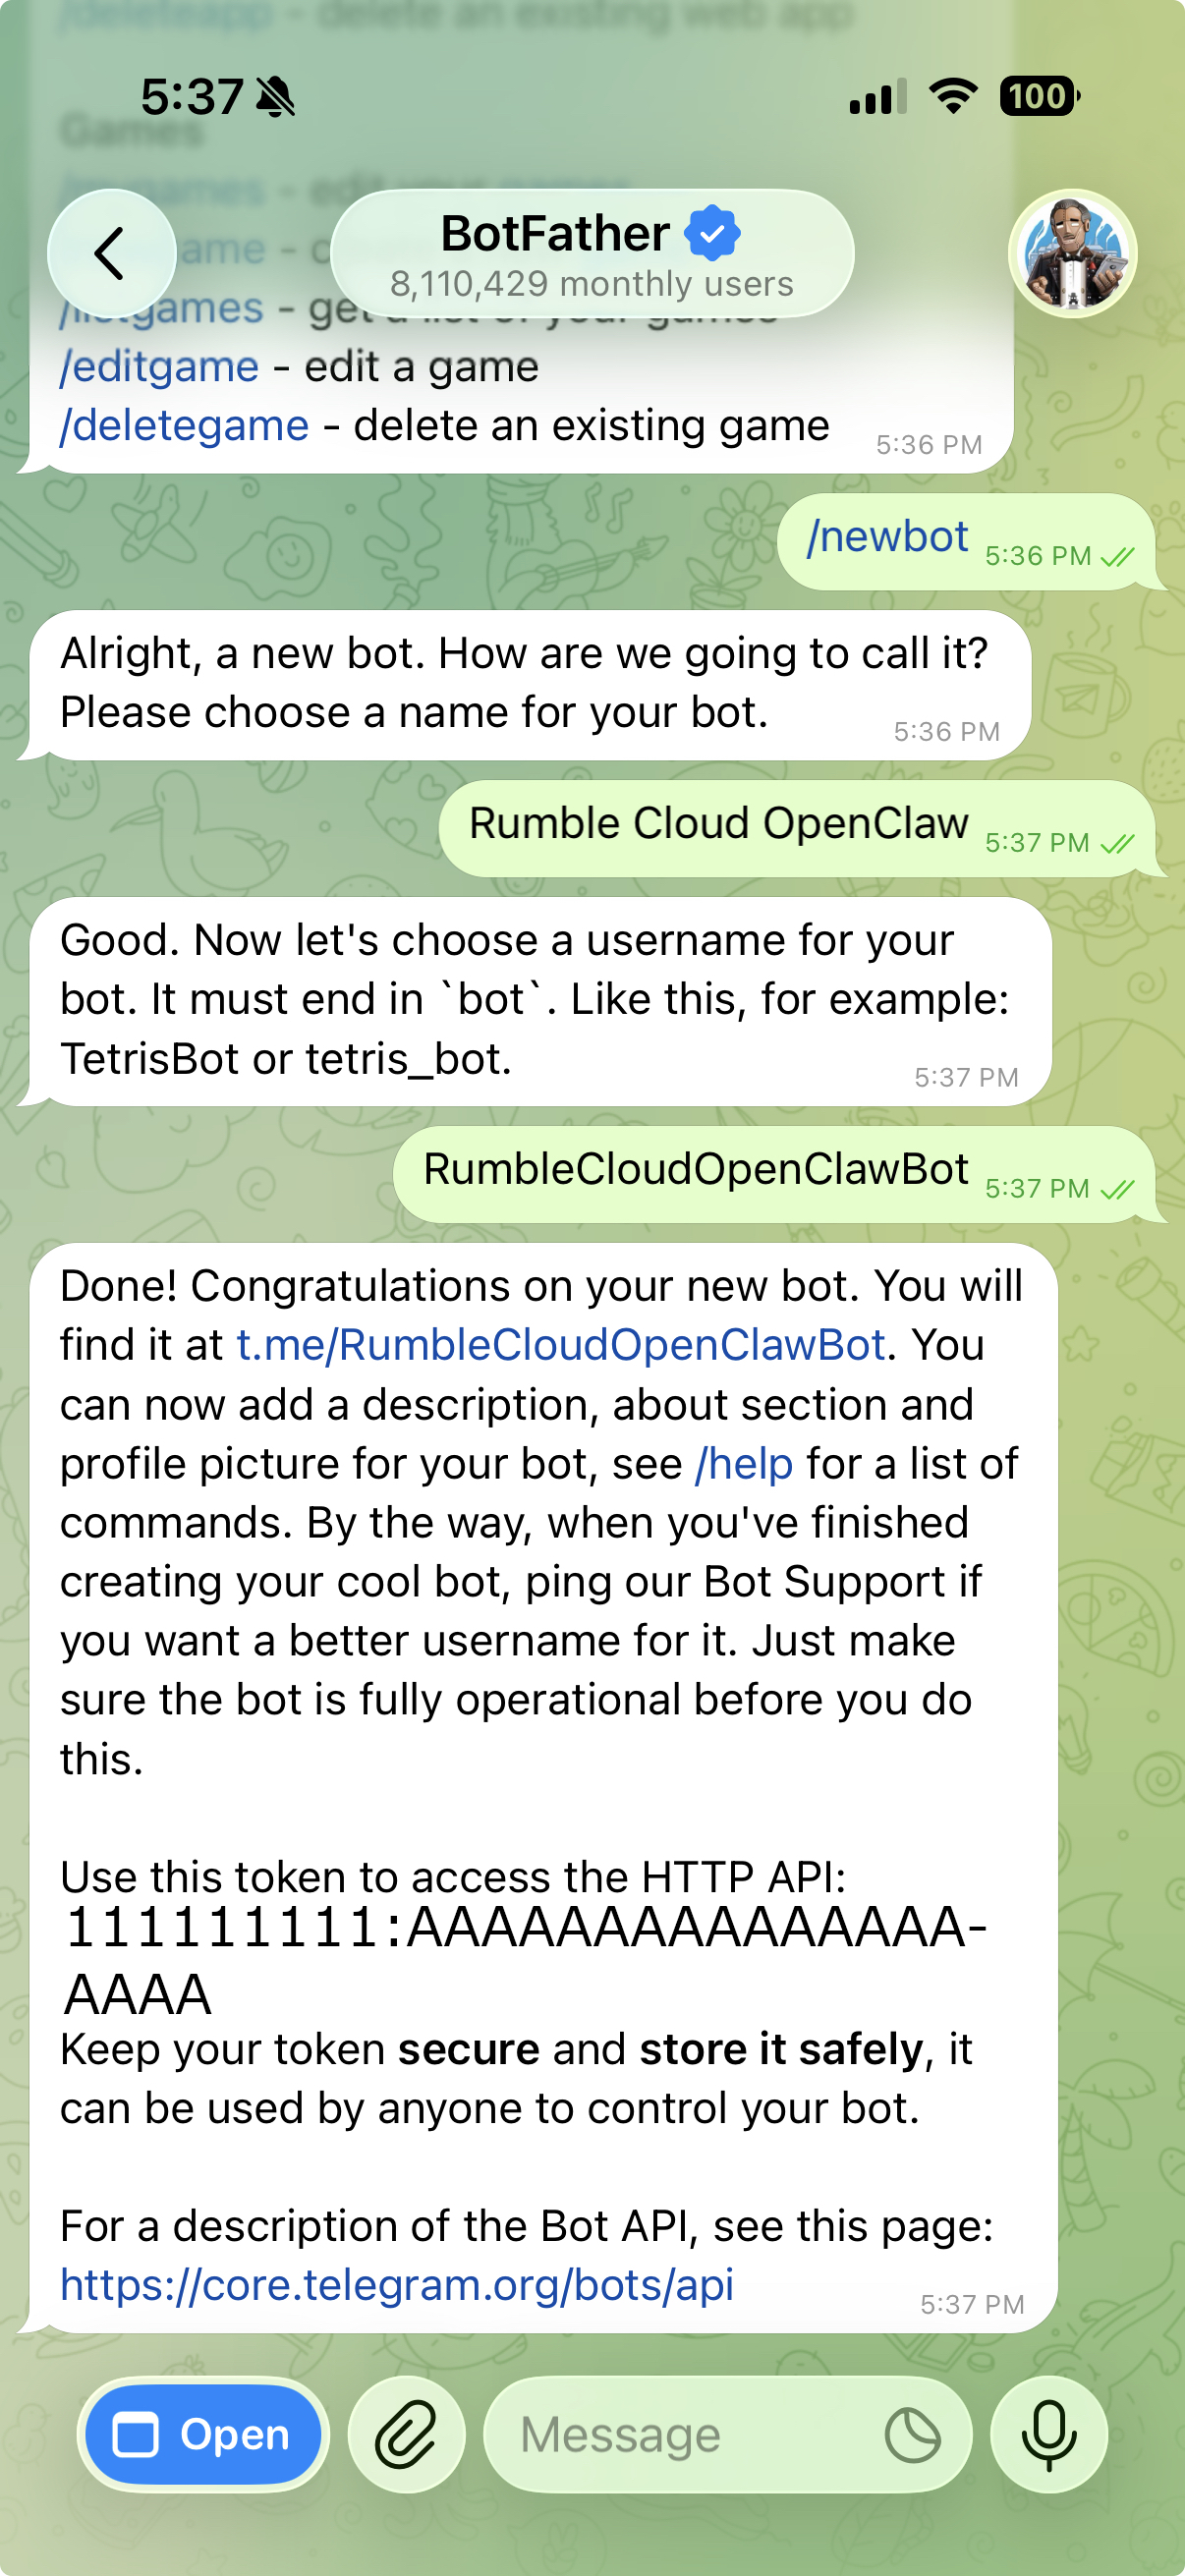 Click to zoom
- Copy the API key from Telegram and paste it at the prompt in your console.
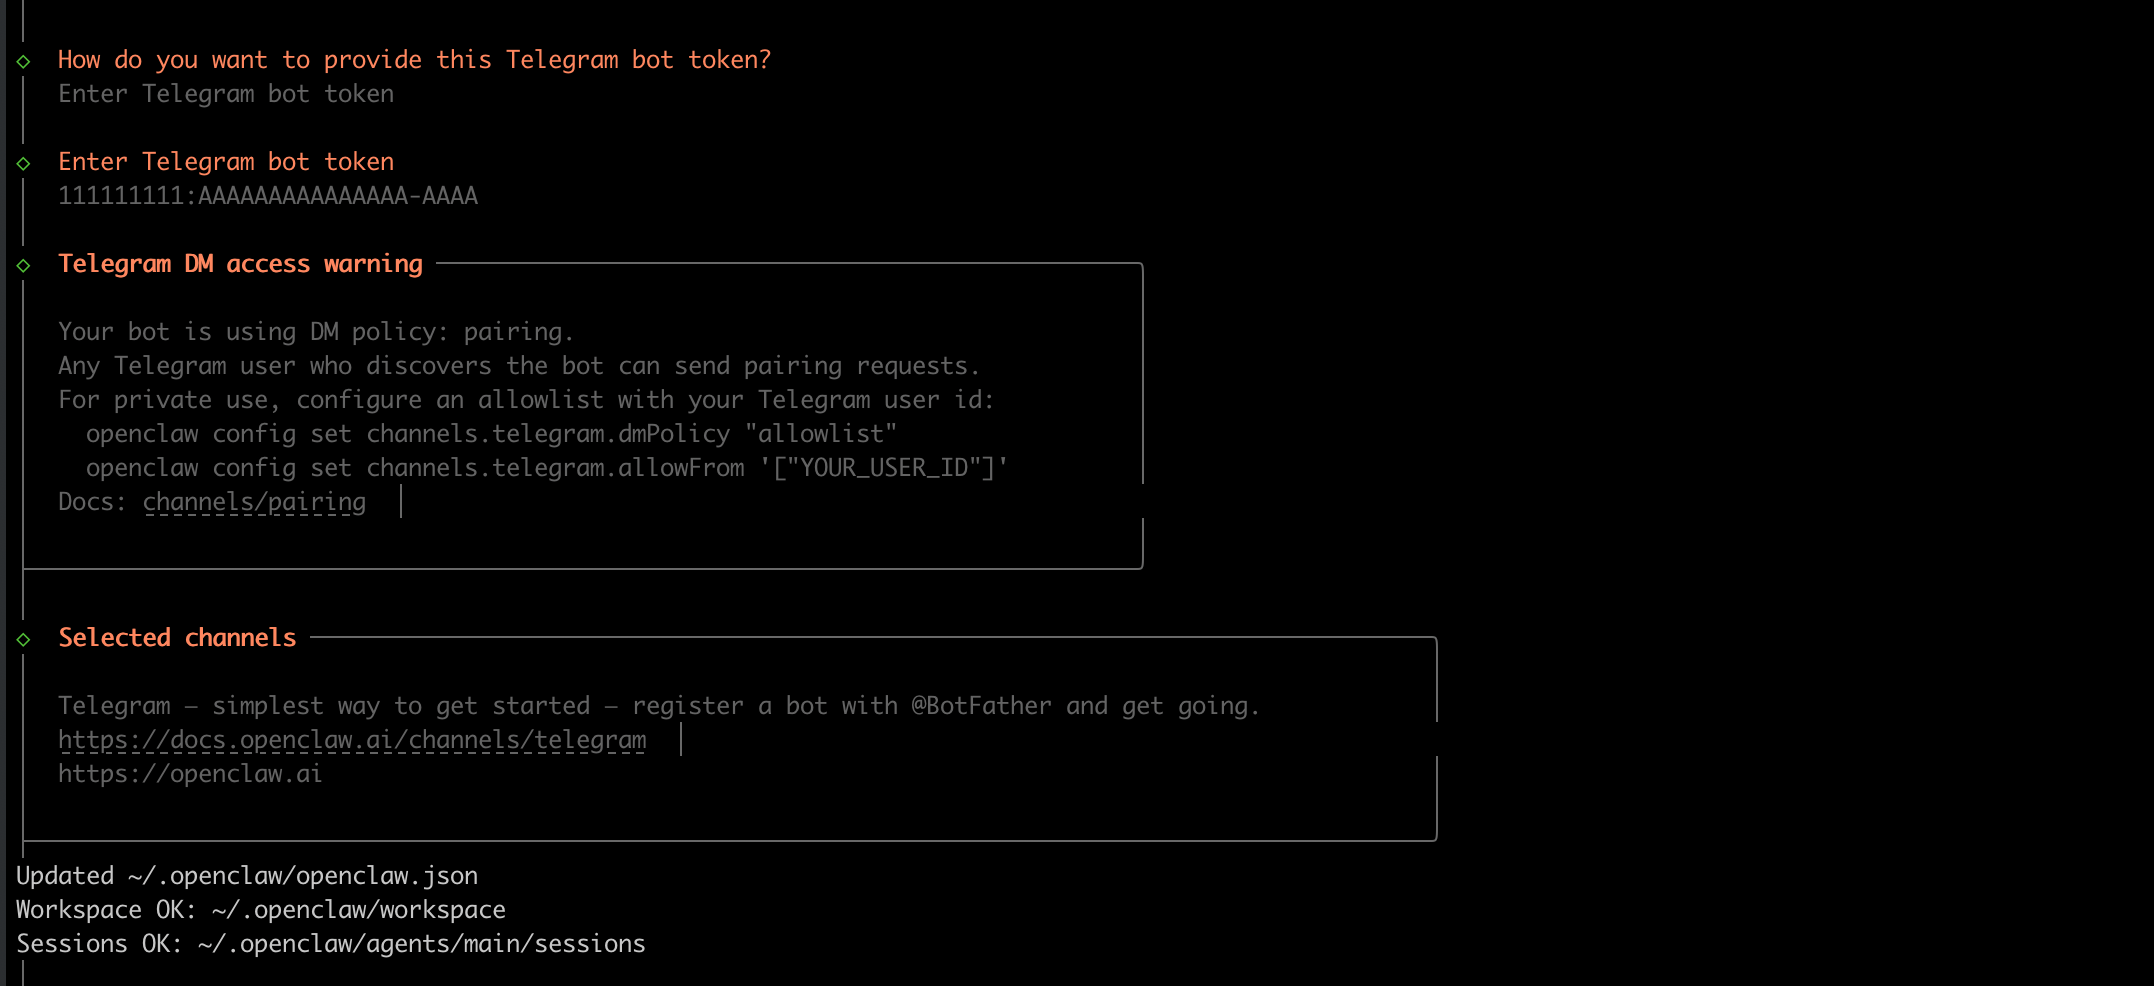 Click to zoom
Step 15: Web search provider#
Select a web search provider, or skip for now unless you have a paid search plan.
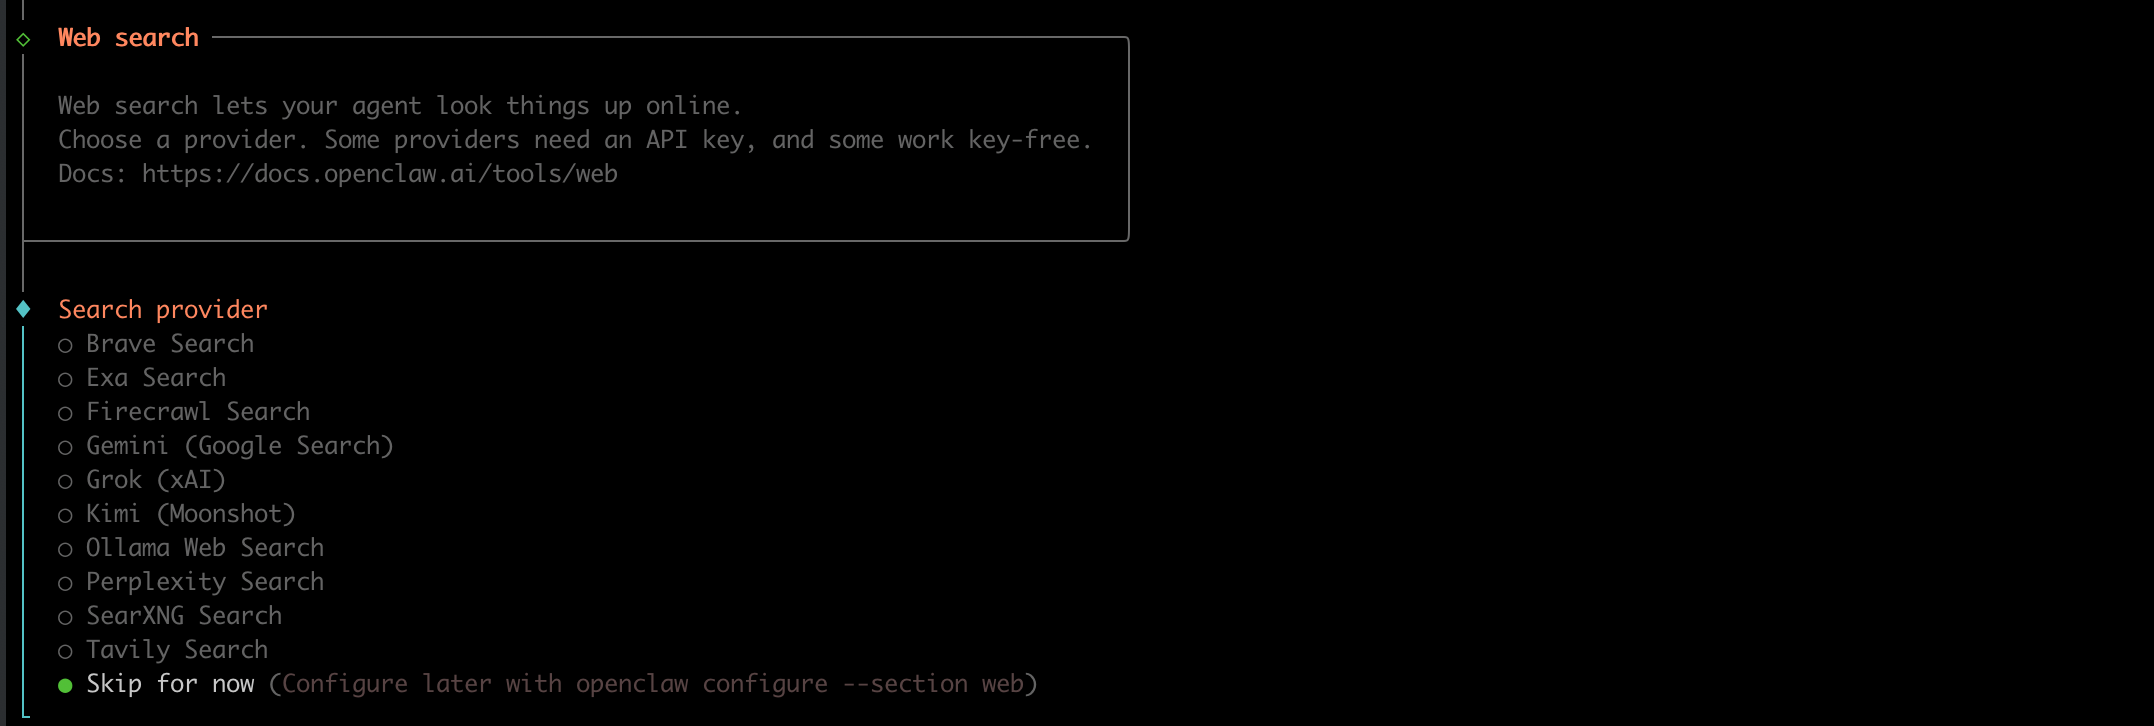 Click to zoom
Step 16: Configure skills#
You can configure skills for your OpenClaw. The Quake AI image includes the packages needed for most default skills. If this is your first install, skip this for now: you can configure skills later.
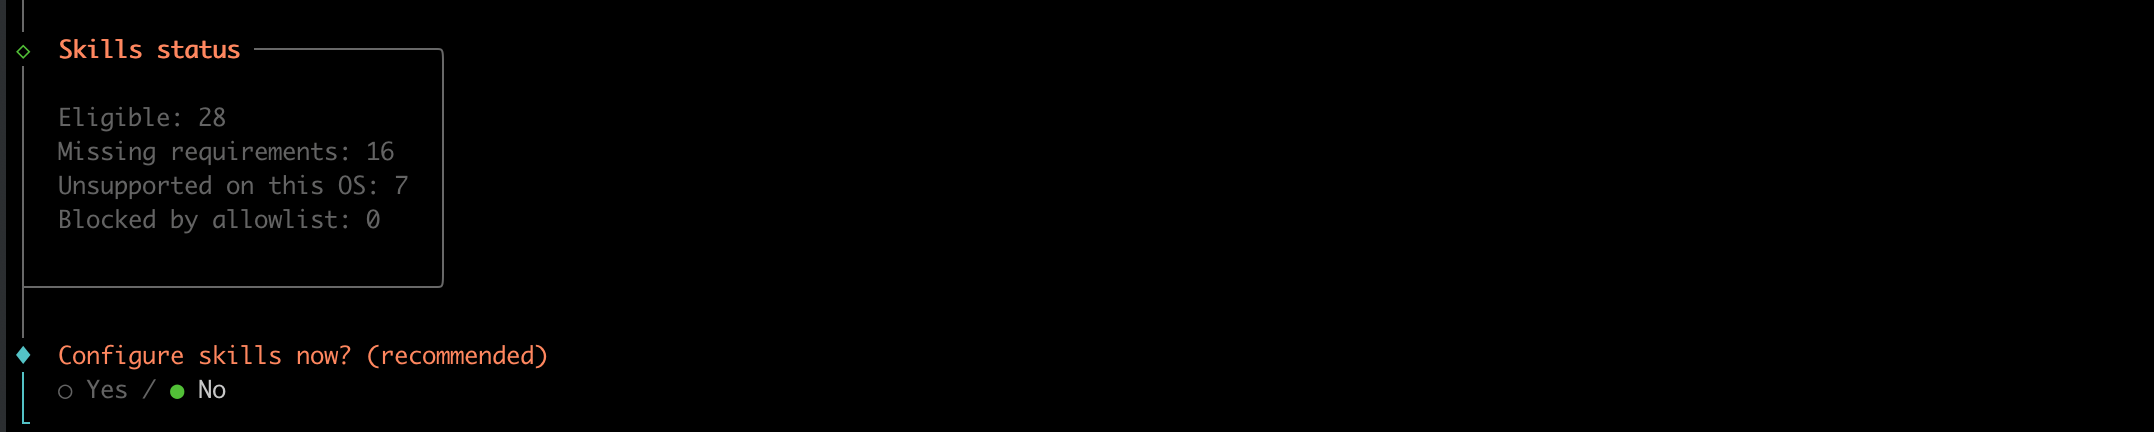 Click to zoom
Step 17: Configure hooks#
The hooks menu works differently from the previous menus. Press Space on Skip for now (the square to the left should be filled in), then press Enter.
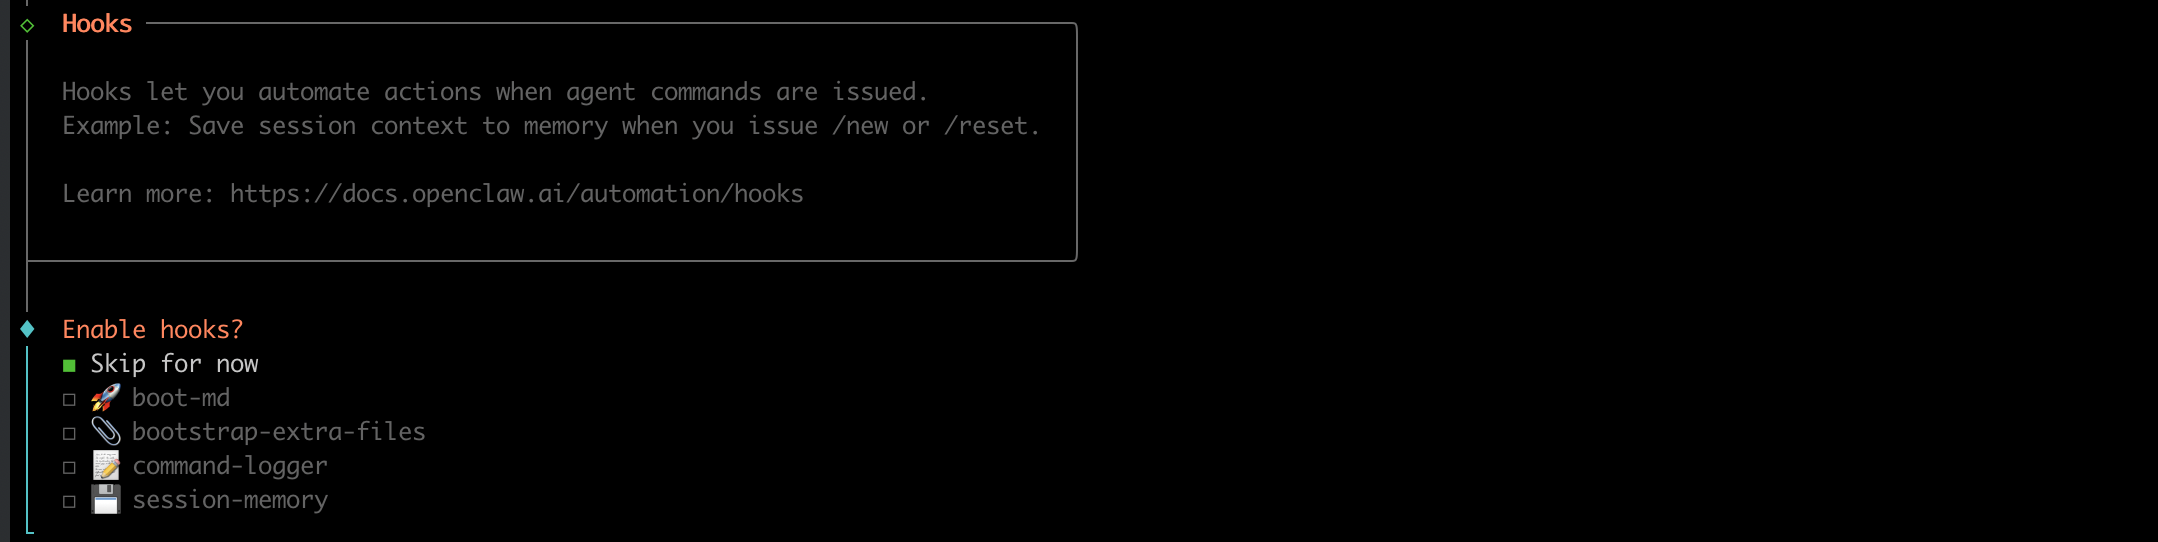 Click to zoom
Step 18: Hatch your agent#
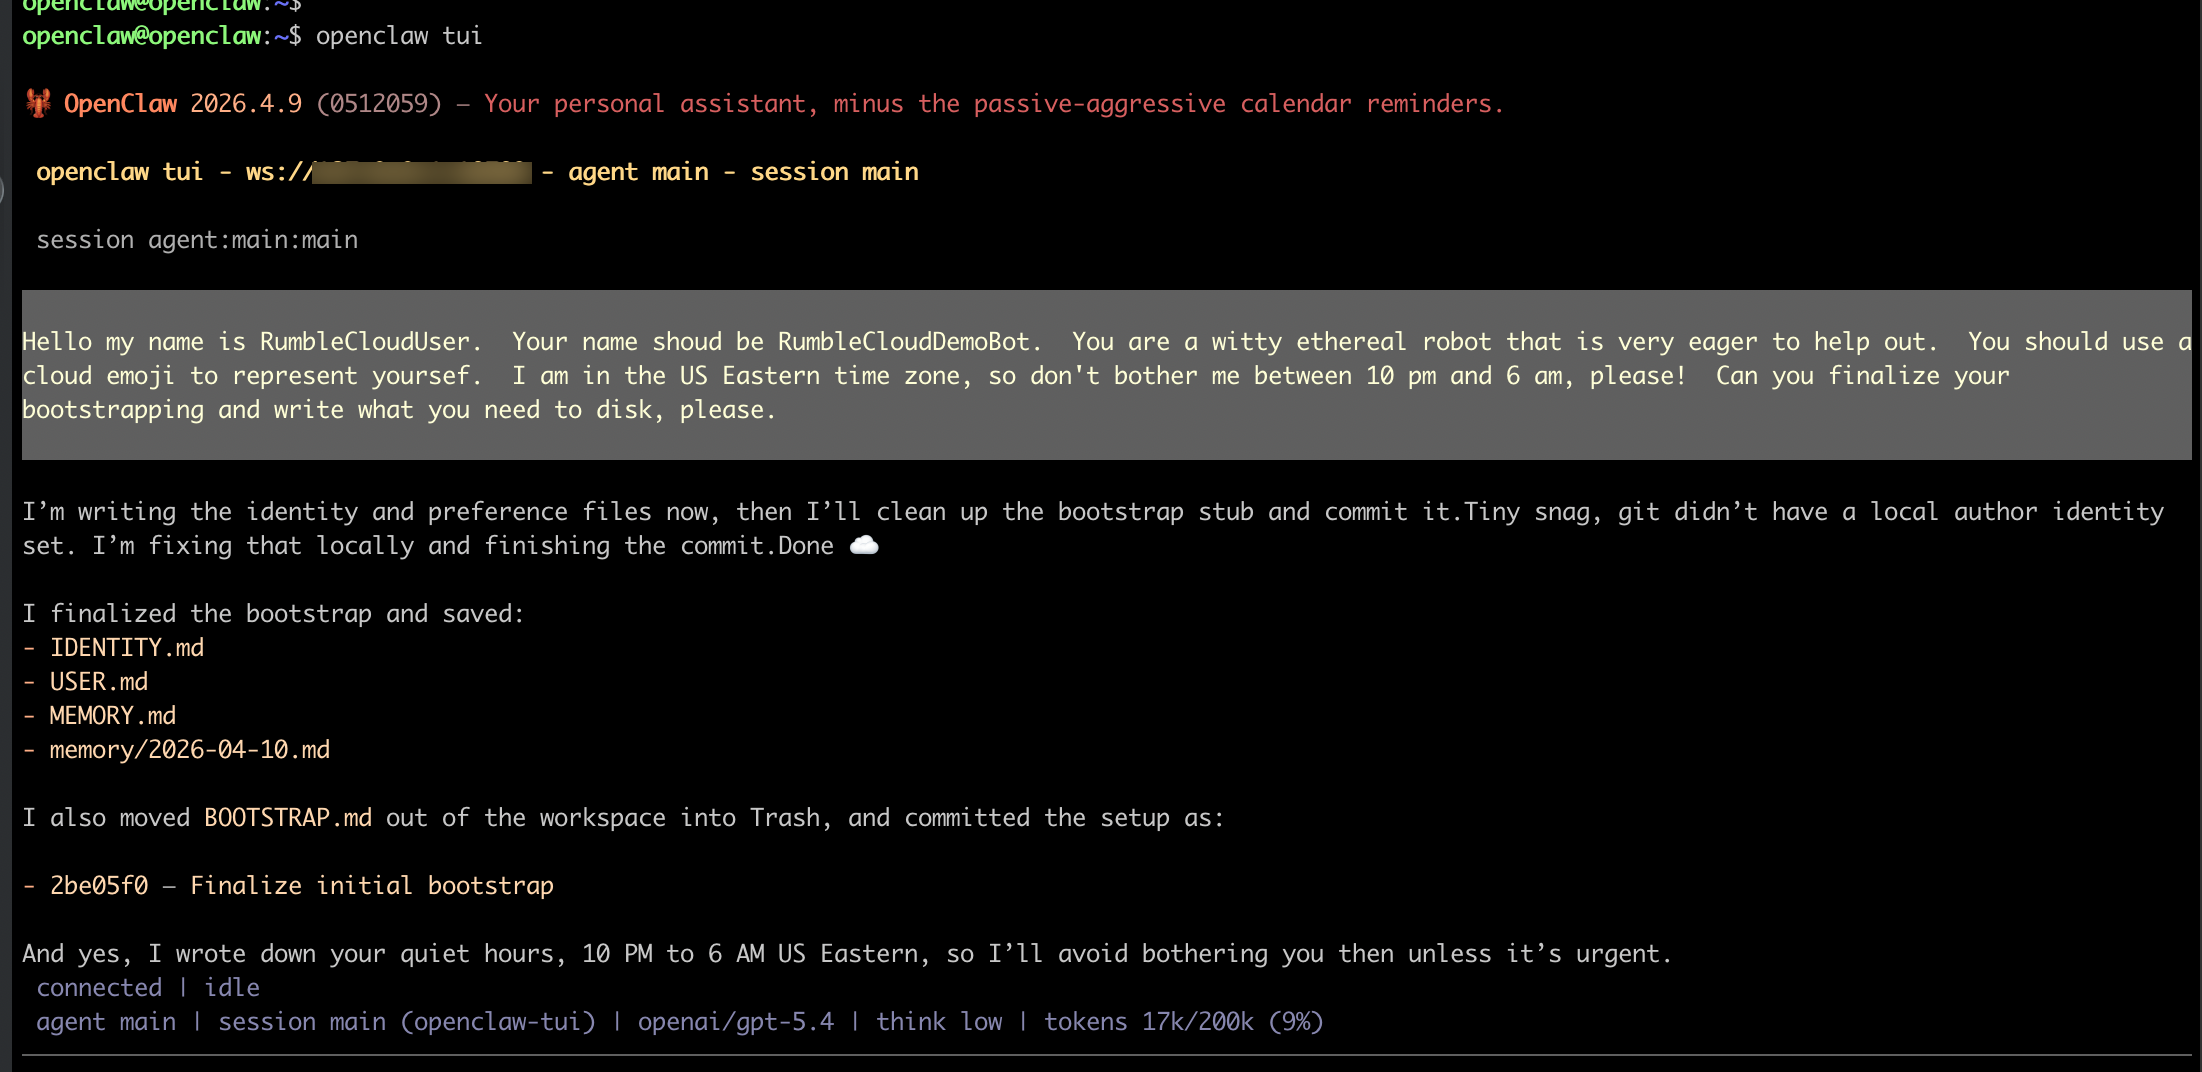
Finish setup by hatching your agent in the TUI.
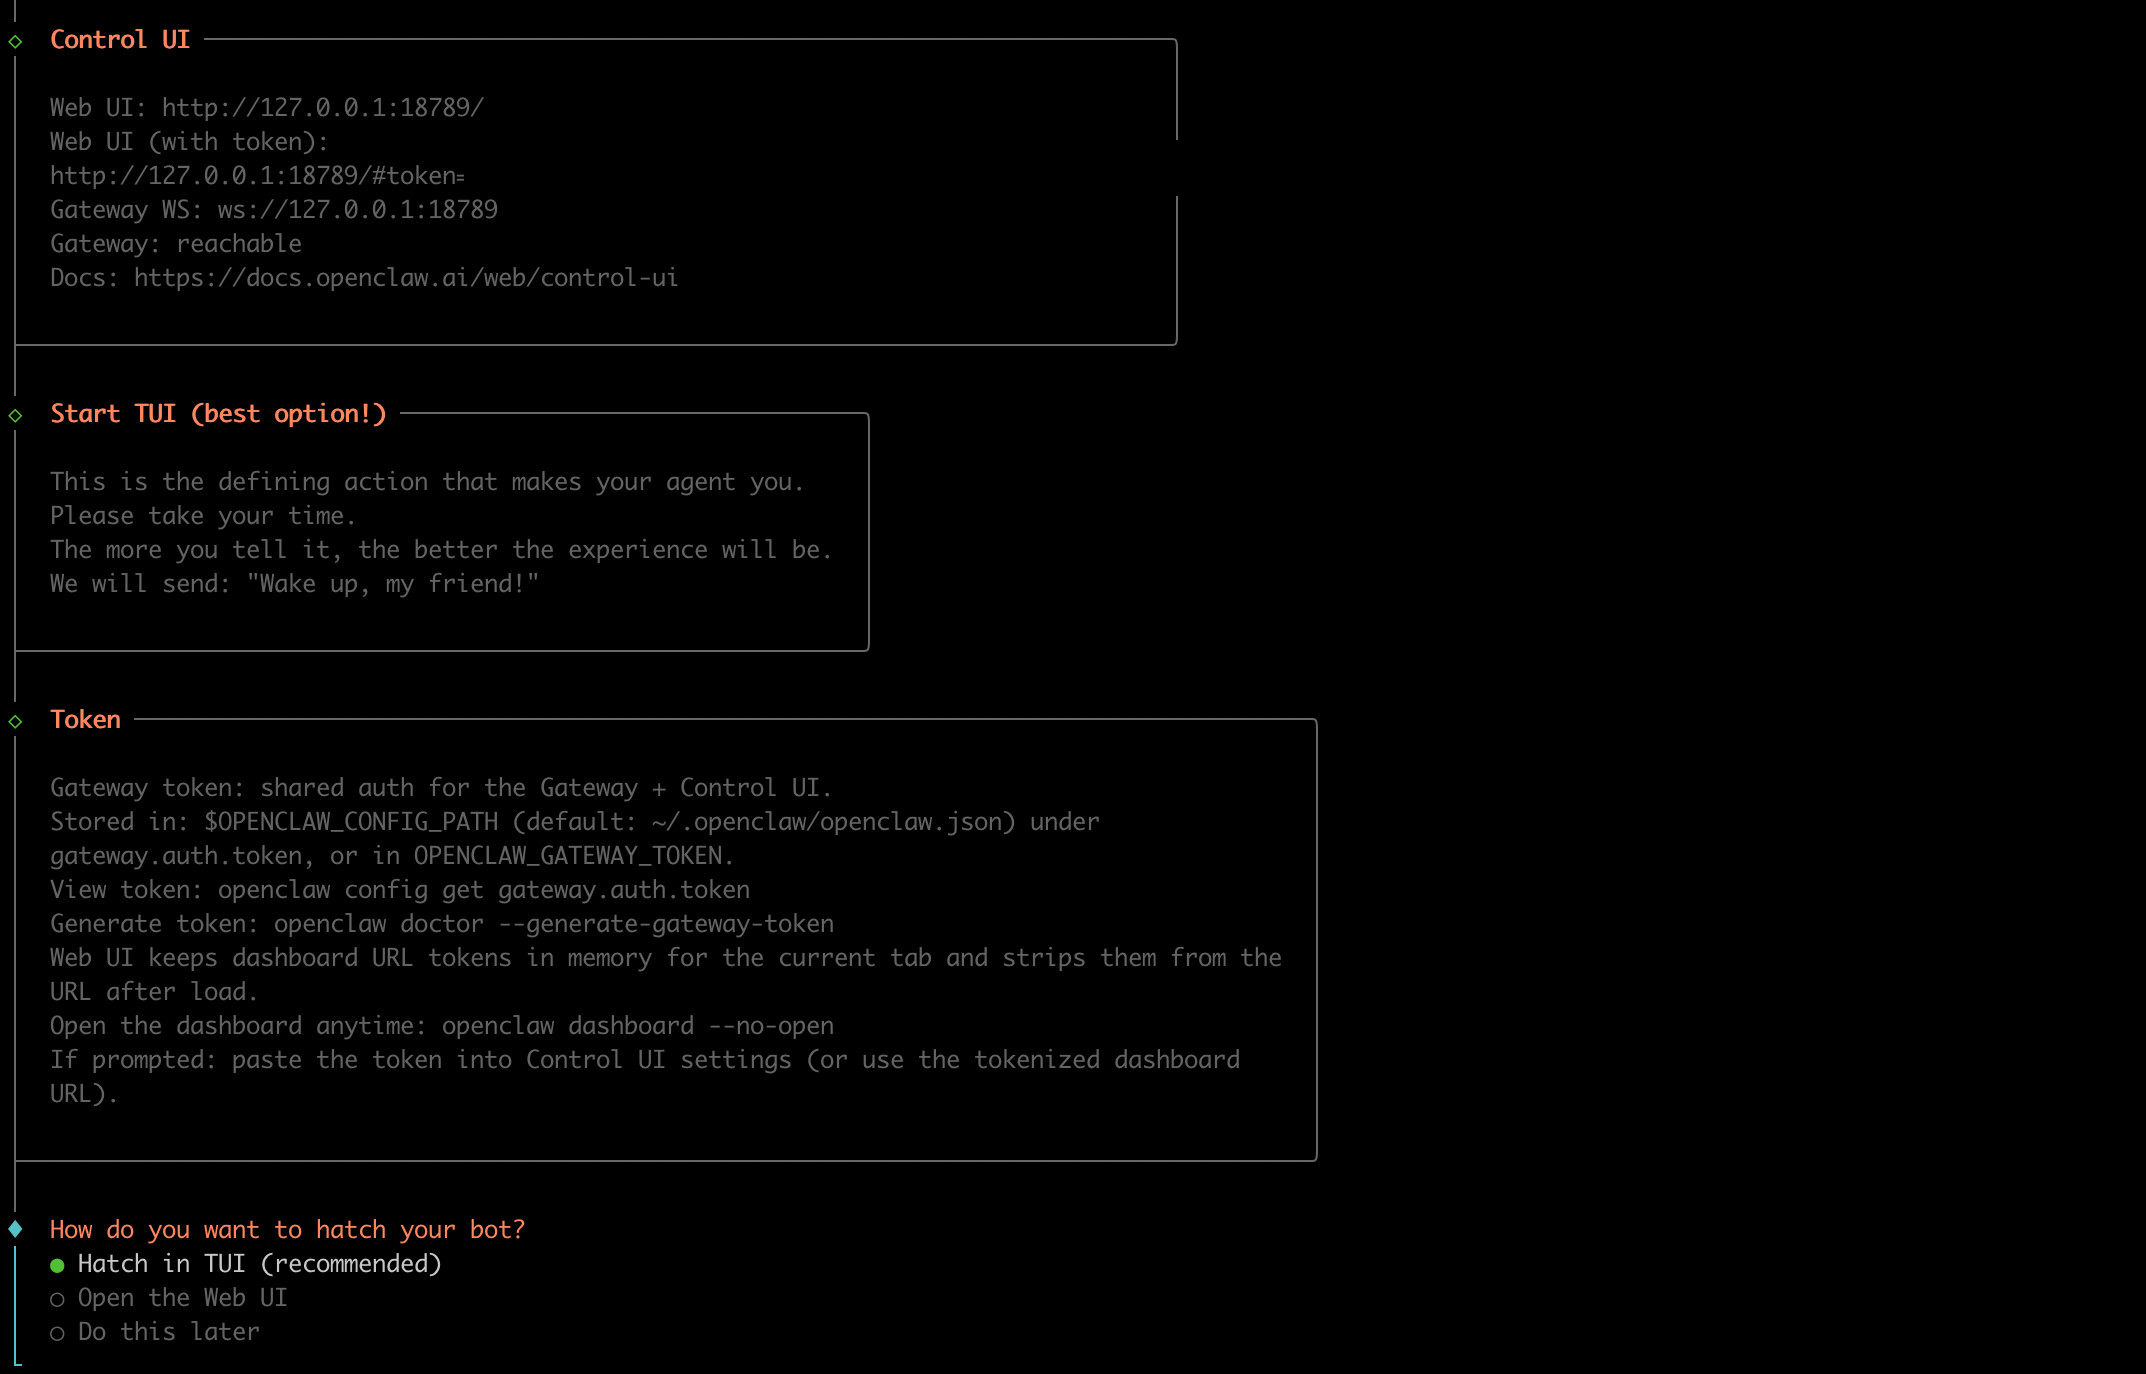 Click to zoom
Step 19: Name and personalize your agent#
Give your agent a name and personality. Tell OpenClaw something like: "Hello, my name is YOUR_NAME. Your name should be YOUR_BOT_NAME. You are a witty ethereal robot that is eager to help out. You should use a cloud emoji to represent yourself. I am in the US Eastern time zone, so do not bother me between 10 PM and 6 AM. Can you finalize your bootstrapping and write what you need to disk, please."
 Click to zoom
Step 20: Exit the TUI#
Type /quit to exit the TUI. You can restart it at any time by running openclaw tui.
 Click to zoom
Connect telegram#
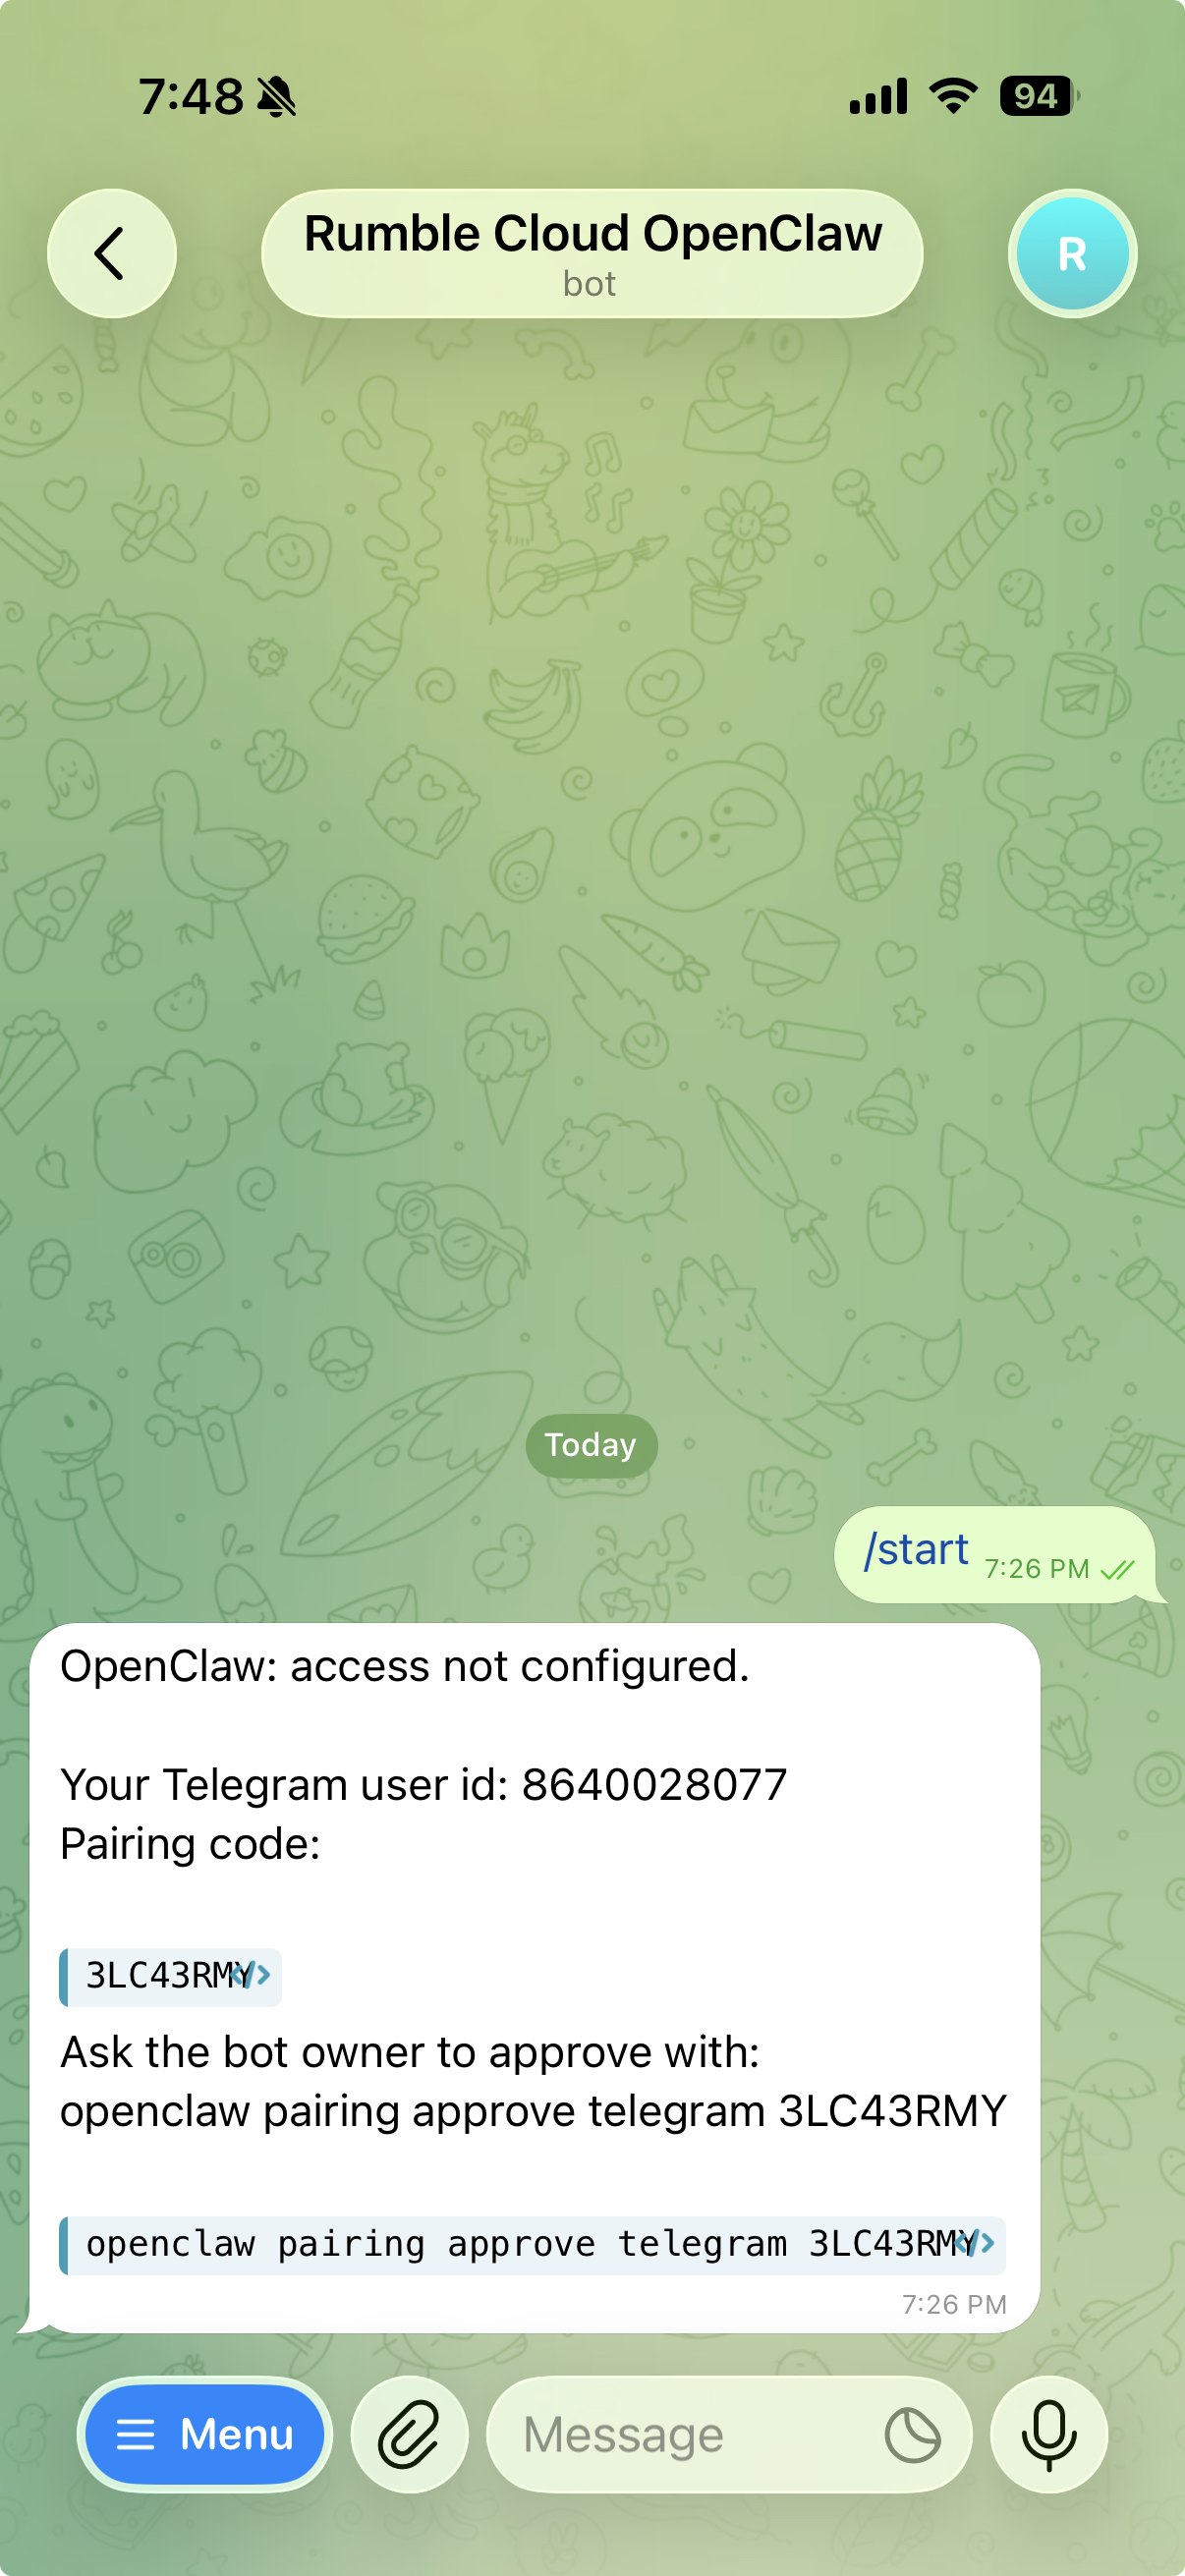
If you set up Telegram during onboarding, open your chat with BotFather and find the link to your bot (for example, t.me/QuakeOpenClawBot). Click the link: it opens a connection to your OpenClaw bot, which replies with instructions to pair.
 Click to zoom
From the command line, run the pair command from Telegram:
openclaw pairing approve telegram YOUR_PAIRING_CODE Click to zoom
Access the web interface#
Exit your current shell (type exit) and log back in. If external web access is enabled (the default), you see a Web access via external HTTPS section with a URL, username, and password. Open the URL in your browser and log in.
 Click to zoom
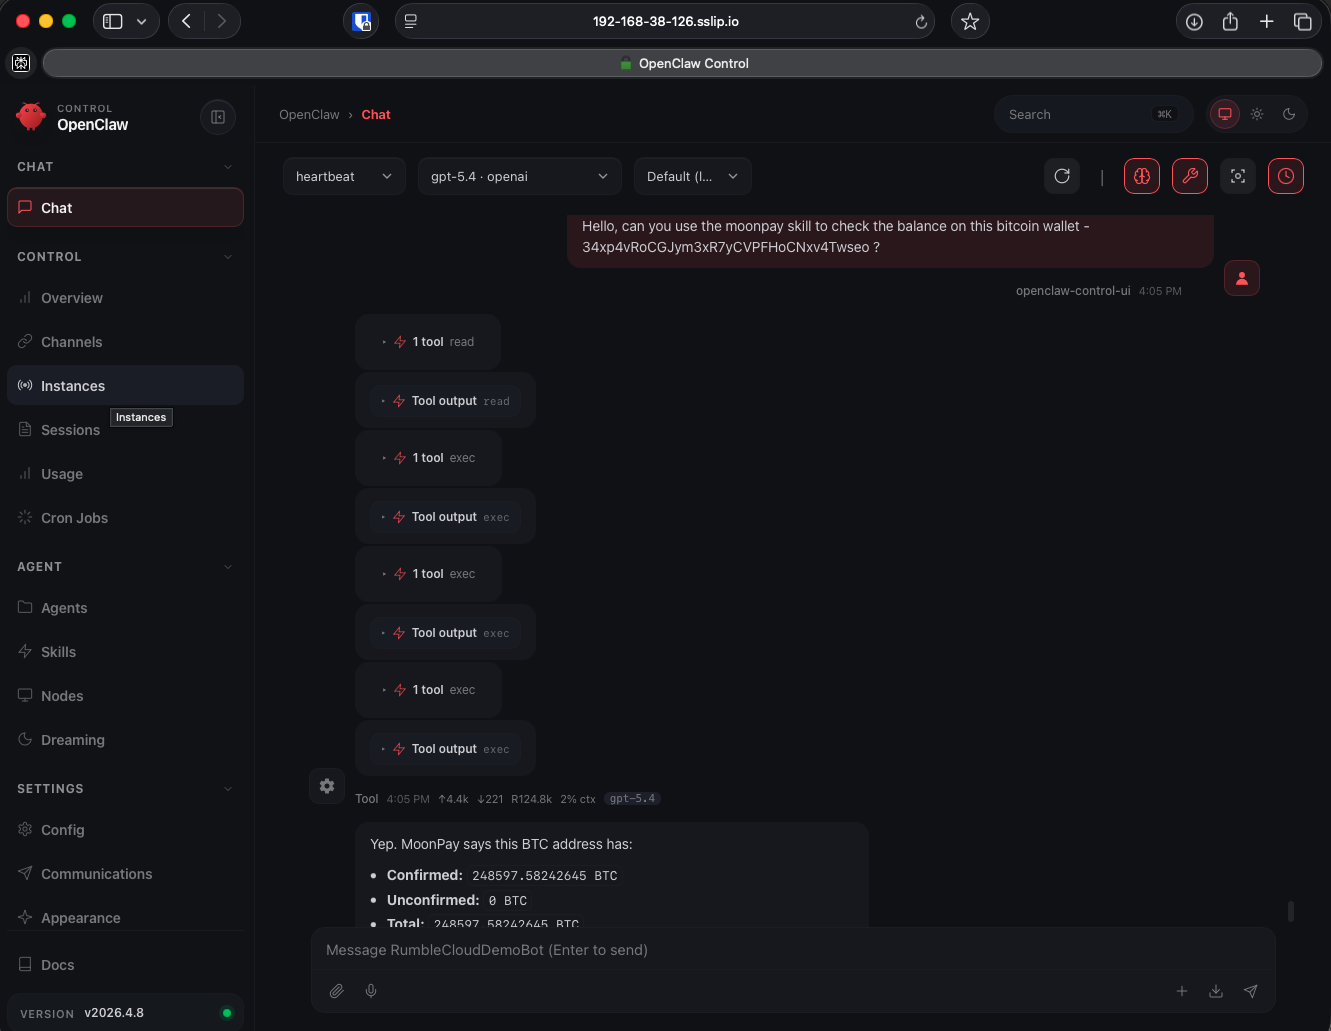
The URL uses the format https://YOUR_FLOATING_IP_WITH_HYPHENS.sslip.io/, where YOUR_FLOATING_IP_WITH_HYPHENS is your floating IP with each dot replaced by a hyphen. TLS comes from sslip.io.
 Click to zoom
You can now interact with your OpenClaw through the web interface, the TUI (openclaw tui), or your connected messaging platforms.
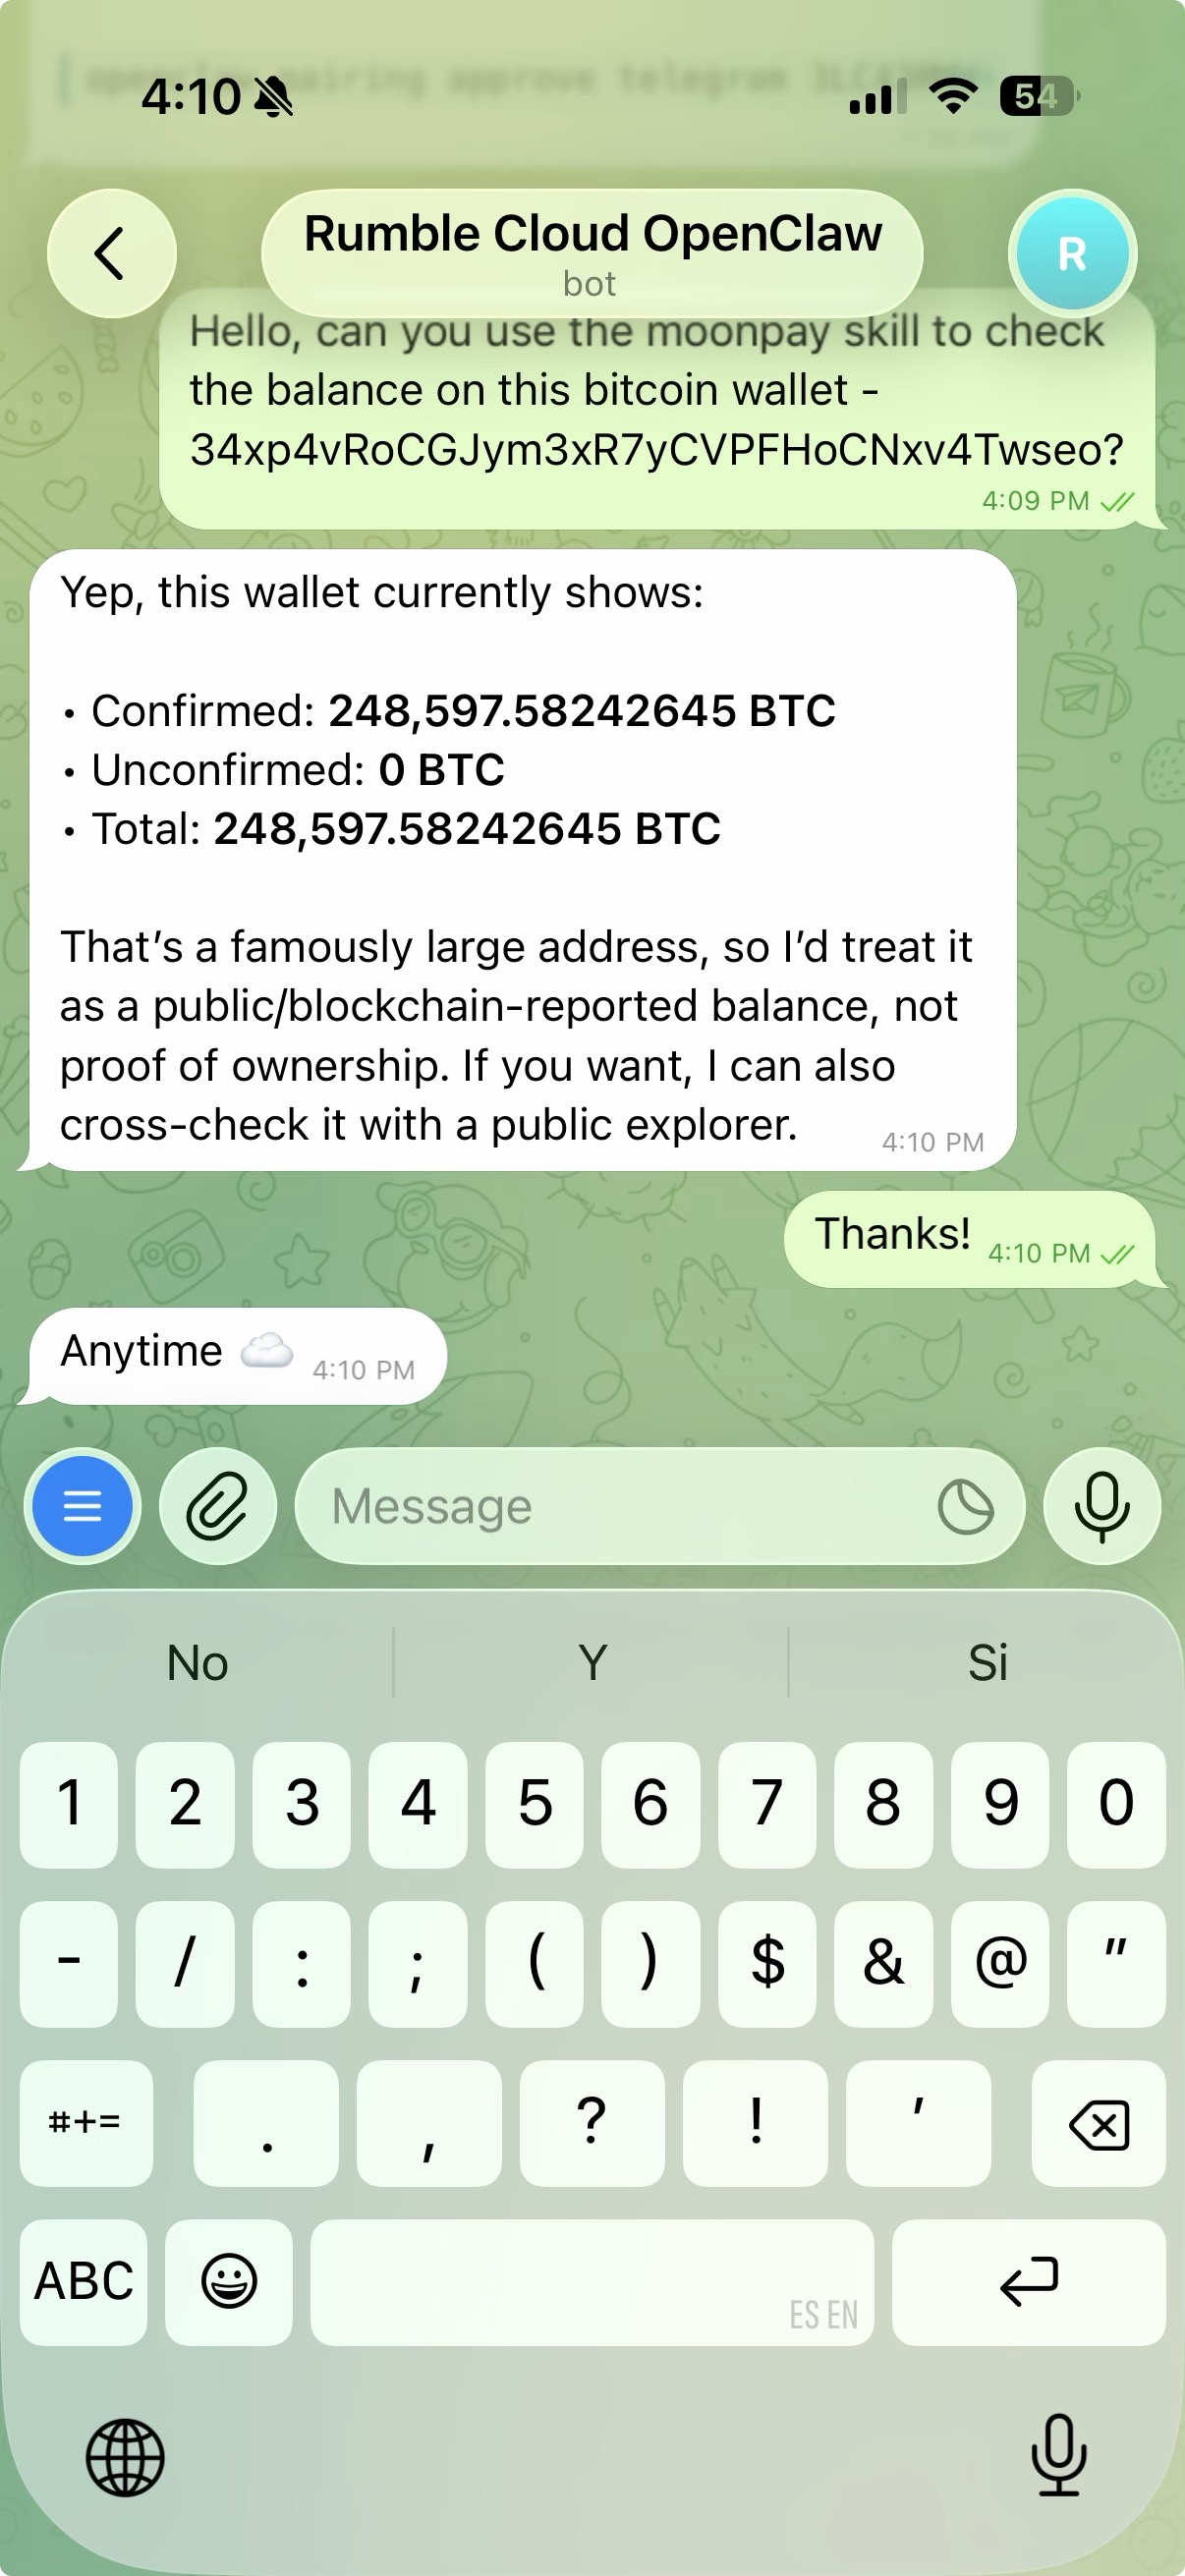 Click to zoom
Security considerations#
Change the generated web password. The default password is generated at deploy time and displayed in plaintext on SSH re-login. Treat it as a temporary credential.
Protect your API keys. AI provider API keys are managed by the onboarding wizard and stored on the VM. They are not exposed to the internet, but treat them as sensitive: restrict file permissions and keep your SSH keypair secure.
Keep OpenClaw updated. Check the OpenClaw release notes for update instructions. Follow security best practices documented at OpenClaw security.
Troubleshooting#
openclaw onboard takes a long time to start. The wizard can take 10-30 seconds to initialize on first run. Wait for the security banner before proceeding.
TUI drops to a command prompt instead of launching. Run openclaw devices approve --latest to approve the device, then run openclaw tui to launch the TUI manually.
Hooks menu does not respond to Enter. Unlike other menus in the onboarding wizard, the hooks selection requires you to press Space to fill the checkbox before pressing Enter.
What is OpenClaw#
OpenClaw is a free, open-source AI agent framework created by Peter Steinberger (founder of PSPDFKit) and maintained by the OpenClaw Foundation under the MIT license. It acts as a gateway server between AI models and messaging platforms, giving your AI assistant persistent memory, tool-calling capabilities, and access to over 3,200 community-built skills on ClawHub.
Unlike browser-based AI assistants, OpenClaw runs 24/7 on your own server. It supports any AI model, from cloud providers like OpenAI, Anthropic, and Google to locally hosted models via Ollama. With Quake AI, your OpenClaw instance runs on infrastructure you own, with your data never leaving your control.
For more details and help, see openclaw.ai.
See also#
- Self-hosted AI on Quake AI: overview of all AI workload options
- Run a local LLM with Ollama: self-hosted inference for any agent framework
- Deploy an AI agent: general guide covering Flowise, n8n, and custom stacks
- Apps concept: how the Console Apps feature works
- OpenClaw GitHub repository: source code and documentation
- Compute service overview: VM instances, flavors, and images
Usage Guidelines
The sample code, software libraries, command line tools, proofs of concept, templates, and other related technology on this page (including any of the foregoing that is provided by Quake AI personnel) is provided to you as Quake AI Content under the Quake AI Customer Agreement, or the relevant written agreement between you and Quake AI (whichever applies). Do not use this Quake AI Content in your production accounts, or on production or other critical data. You are responsible for testing, securing, and optimizing the Quake AI Content (such as sample code) as appropriate for production grade use based on your specific quality control practices and standards. Deploying Quake AI Content may incur Quake AI charges for creating or using Quake AI chargeable resources, such as running Compute instances or storing data in Object Storage. Your use is also subject to the Acceptable Use Policy.
For the full policy, see Usage Guidelines.
Last validated: 19.05.2026
Quick answers
- Why does `openstack image save` write a 0-byte file for my boot-from-volume instance?CLI
- Why does `openstack server create` fail with "Only volume-backed servers are allowed for flavors with zero disk"?CLIAPITerraform
- Why does my project still have a 10 GiB Cinder volume after I deleted my instance?CLIAPI