Launch your first server
Launch your first server
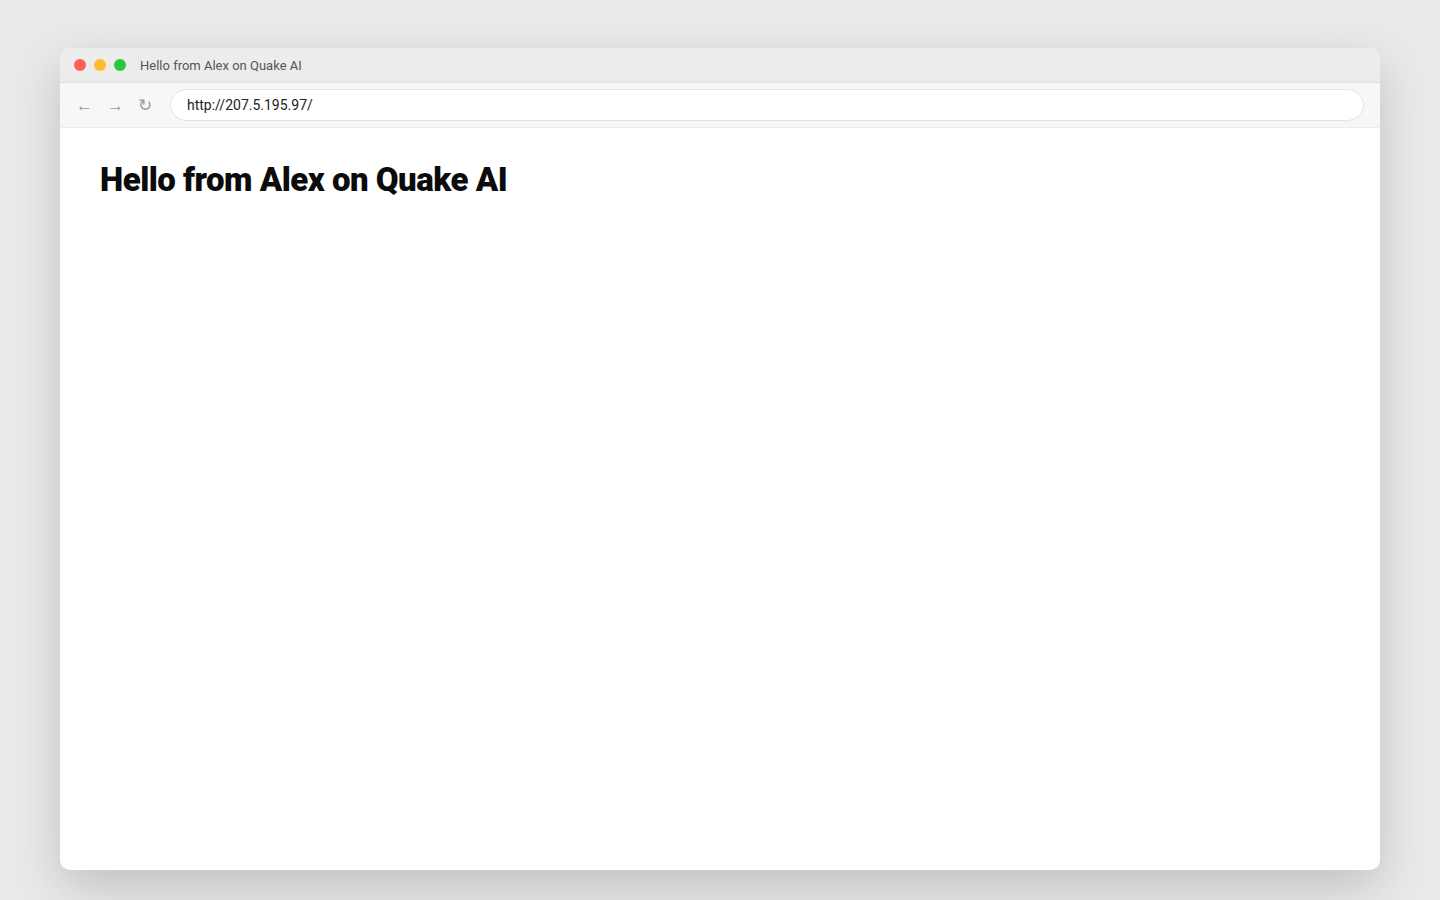
This is the fundamentals path of the Quickstart: the honest IaaS on-ramp every other learning path builds on. The walkthrough takes about 30 minutes and uses a public web server as the working example. By the end, you'll have a running server on the public internet serving a page you wrote yourself, plus a working understanding of how the platform fits together.
 Click to zoom
Prerequisites#
You need a Quake AI account with a project and a resource tier picked. If you have not done that yet, work through Get started at the top of the Quickstart first.
The walkthrough has five steps:
- Set up a secure login from your computer to your server.
- Configure your project's firewall to allow login and web traffic.
- Launch a server.
- Connect to the server, install web-server software, and publish a page.
- Delete the server when you're done (optional).
To follow along, you'll need:
- A web browser and a terminal on your computer (macOS, Linux, or WSL on Windows).
- About 30 minutes. Most of that is the server starting up and the web-server software installing.
You can follow the walkthrough through Quake AI's browser interface (the default), the command line, or OpenTofu (Terraform) code. From step 2 onward, each step has tabs for all three. Pick one and stay with it for the rest of the walkthrough.
If you work with an AI coding assistant, you can reach the same result by driving it instead: see How to provision a server with an AI agent.
The final step is optional. A running server uses your project's resources (a CPU core, memory, a public IP address) and stays reachable from the internet for as long as it's up. Step 5 walks through deleting the server when you're ready to clean up. If you want to keep the server running and experiment further, skip the final step.
1. Add an SSH key#
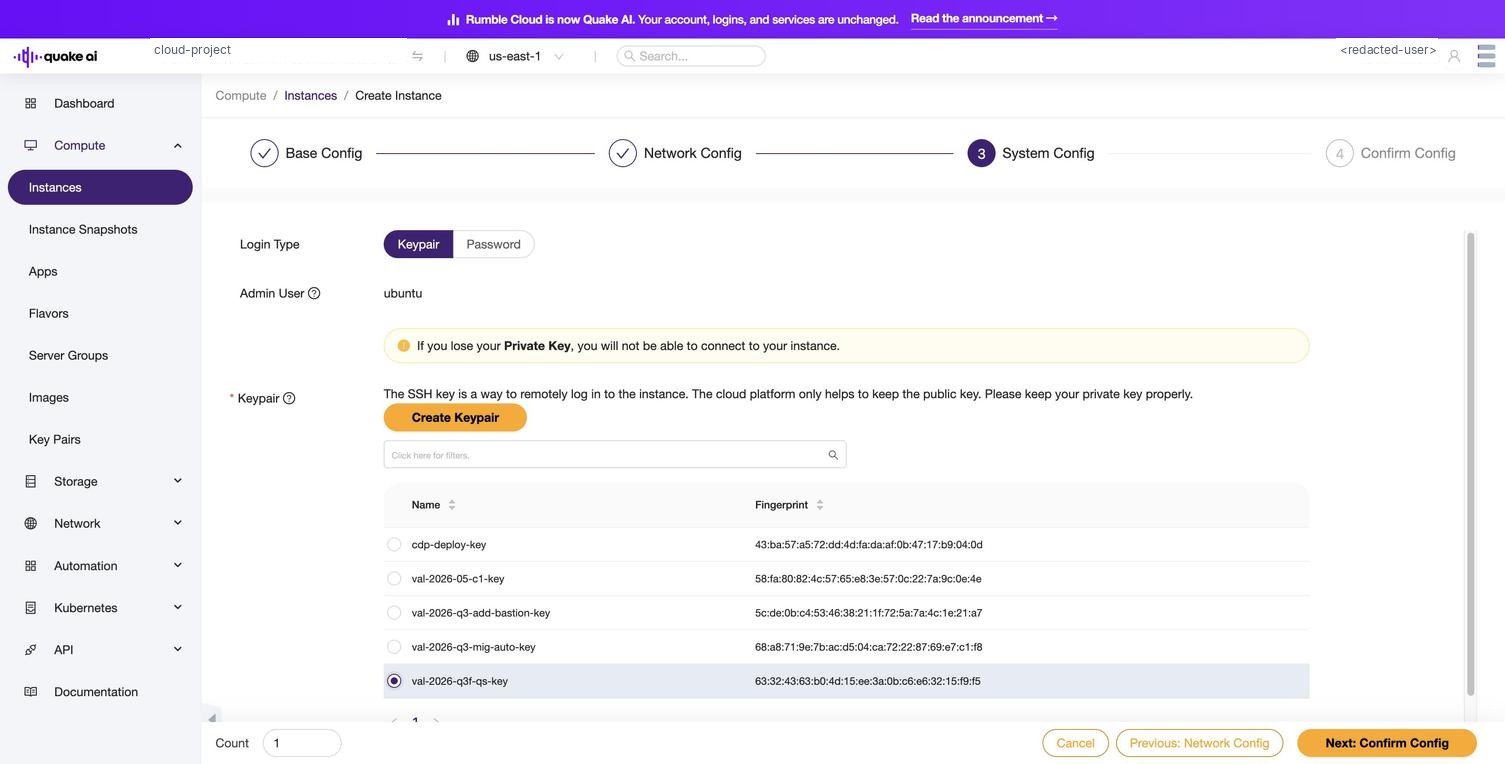
SSH (Secure Shell) is the standard protocol for logging into a Linux server from your terminal. Quake AI authenticates SSH with a key pair: a public key you upload to your project and a private key that stays on your workstation. SSH never transmits the private key over the network. See Key pairs for more.
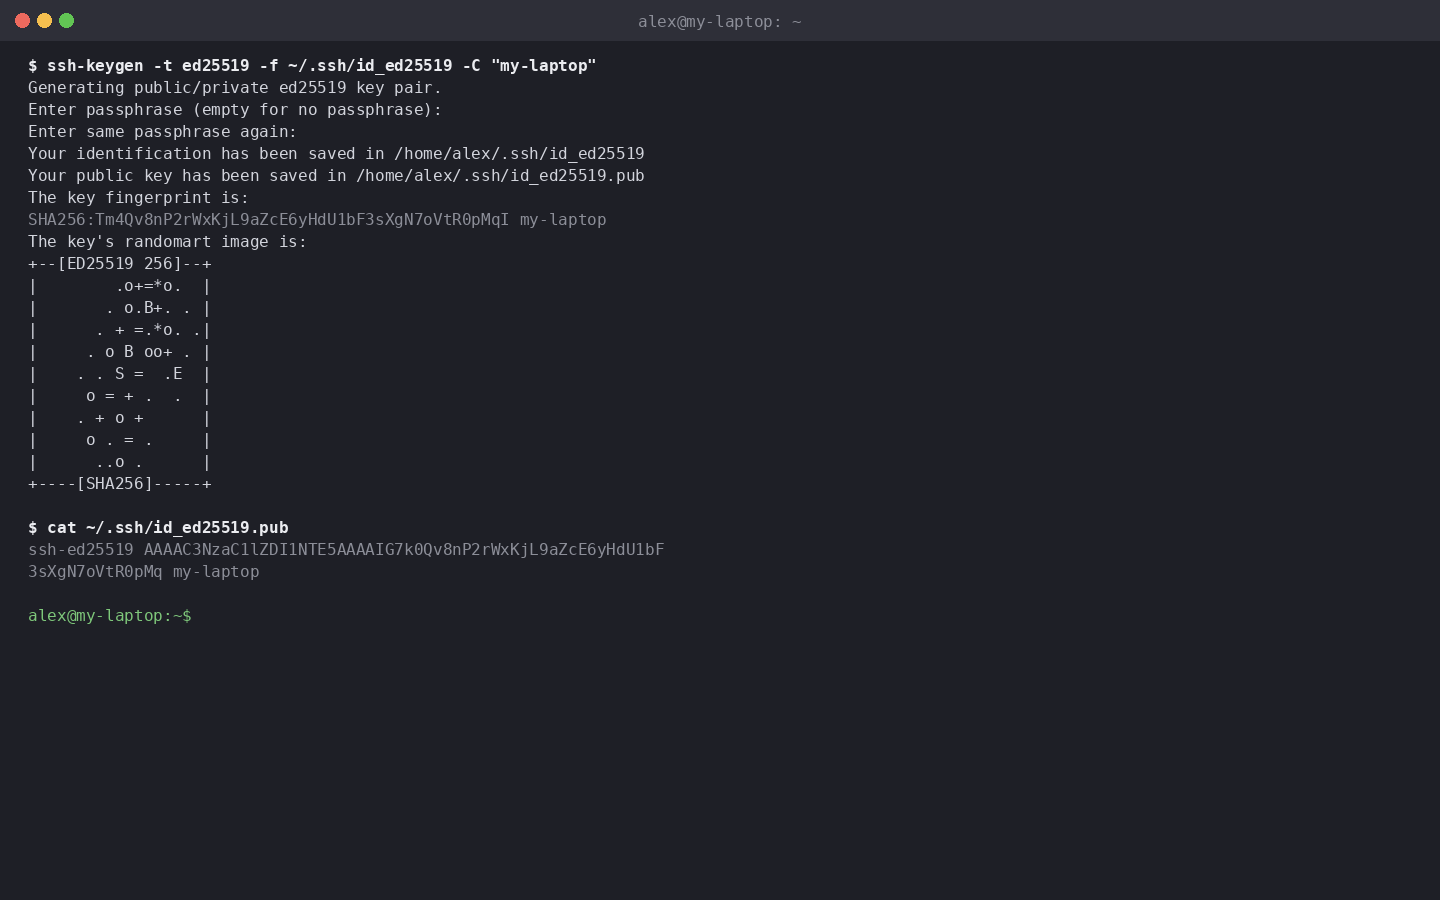
Generate an SSH key pair on your local machine if you do not already have one:
ssh-keygen -t ed25519 -C "[email protected]"When prompted, press Enter to accept the default file location (~/.ssh/id_ed25519). Optionally set a passphrase.
 Click to zoom
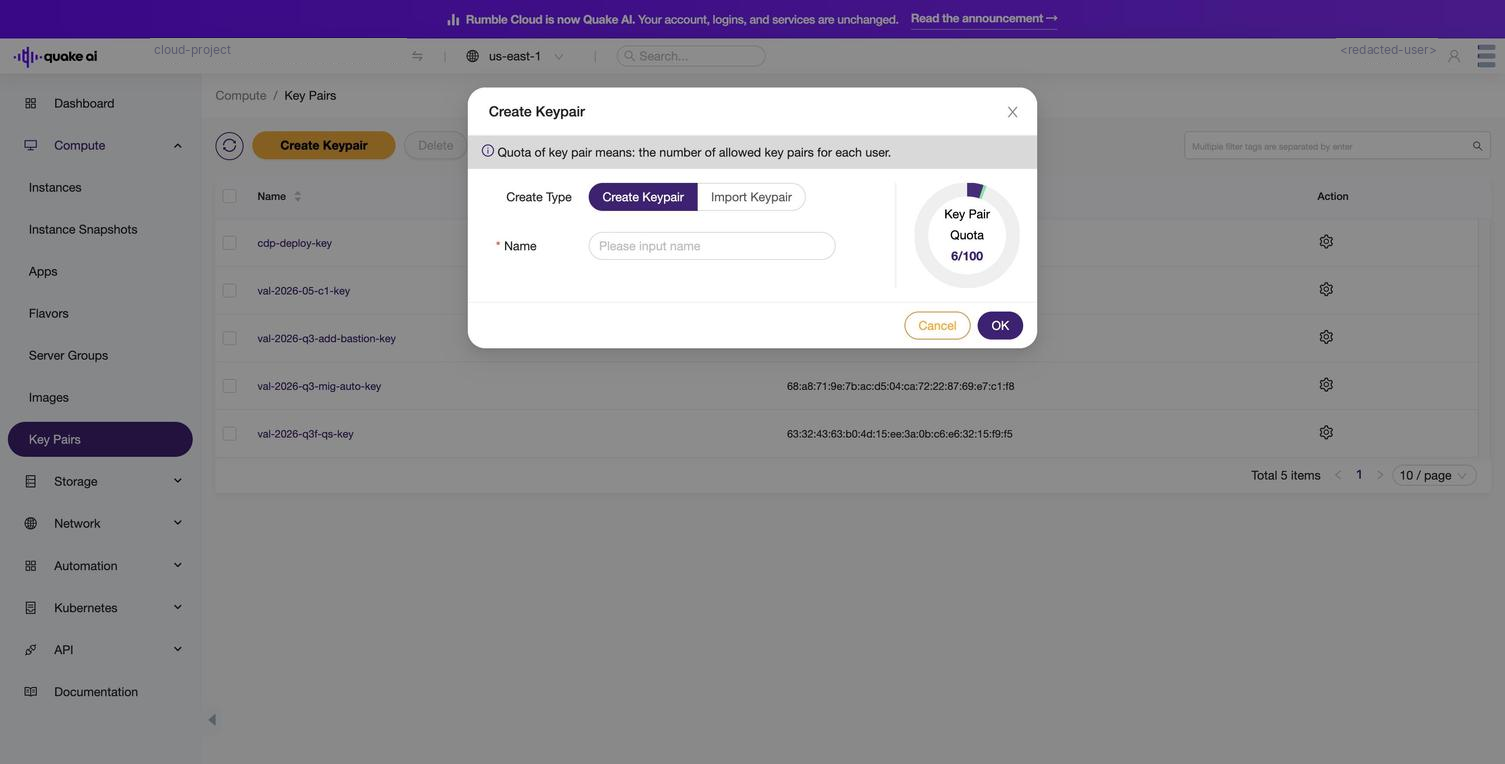
Upload the public key (~/.ssh/id_ed25519.pub) to your project. Name the key after the workstation that holds the private key. my-laptop, your hostname, or your username are all common choices. You will reuse this key for every server you create, so pick a name you will recognize later.
- In the portal, go to Compute > Key Pairs and select Create Keypair.
- In the dialog that opens, switch to the Import Keypair tab.
- Provide a name (for example,
my-laptop). - Paste the contents of
~/.ssh/id_ed25519.pubinto the Public Key field. - Select OK.
 Click to zoom
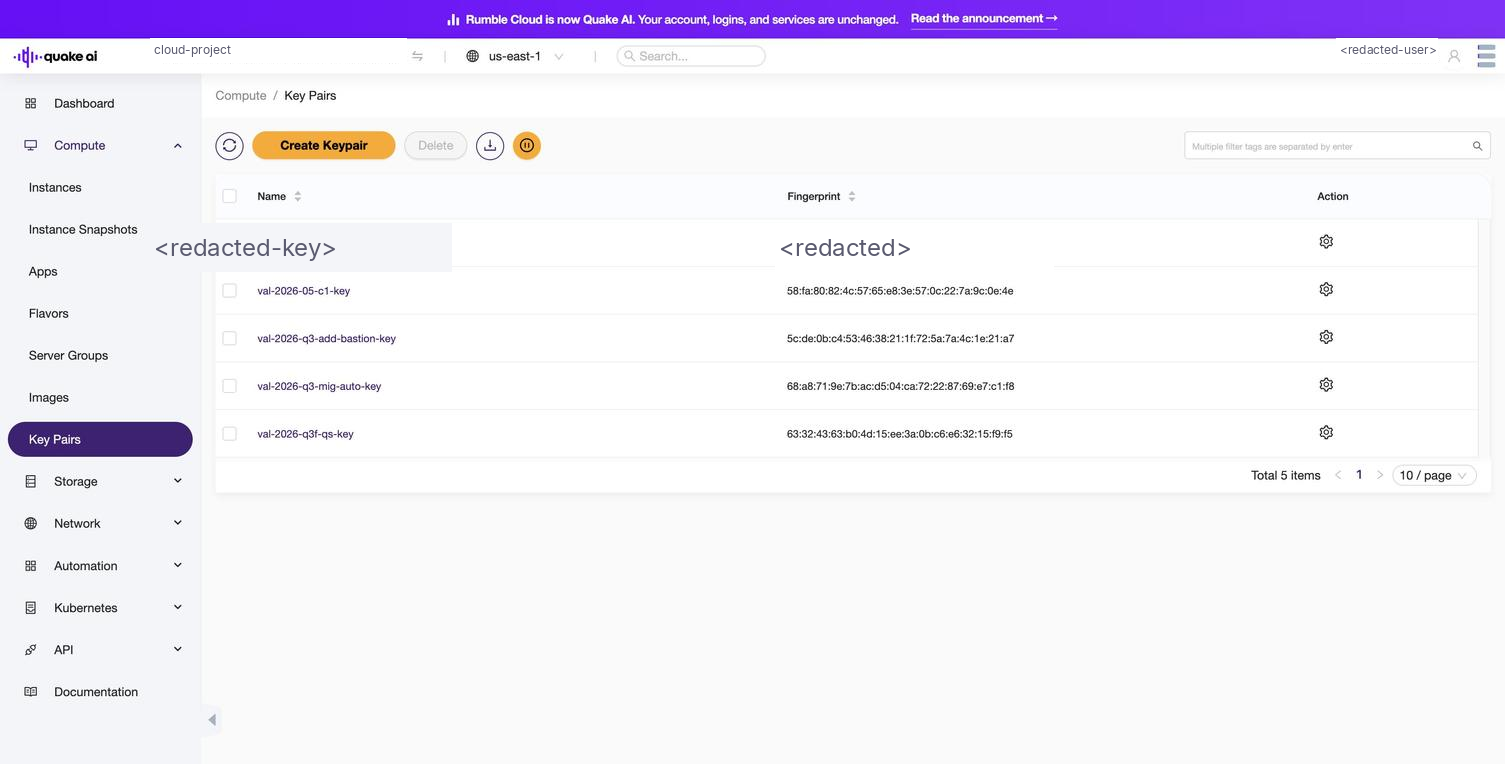
Verify your key appears in the Key Pairs list before continuing.
 Click to zoom
2. Create a security group#
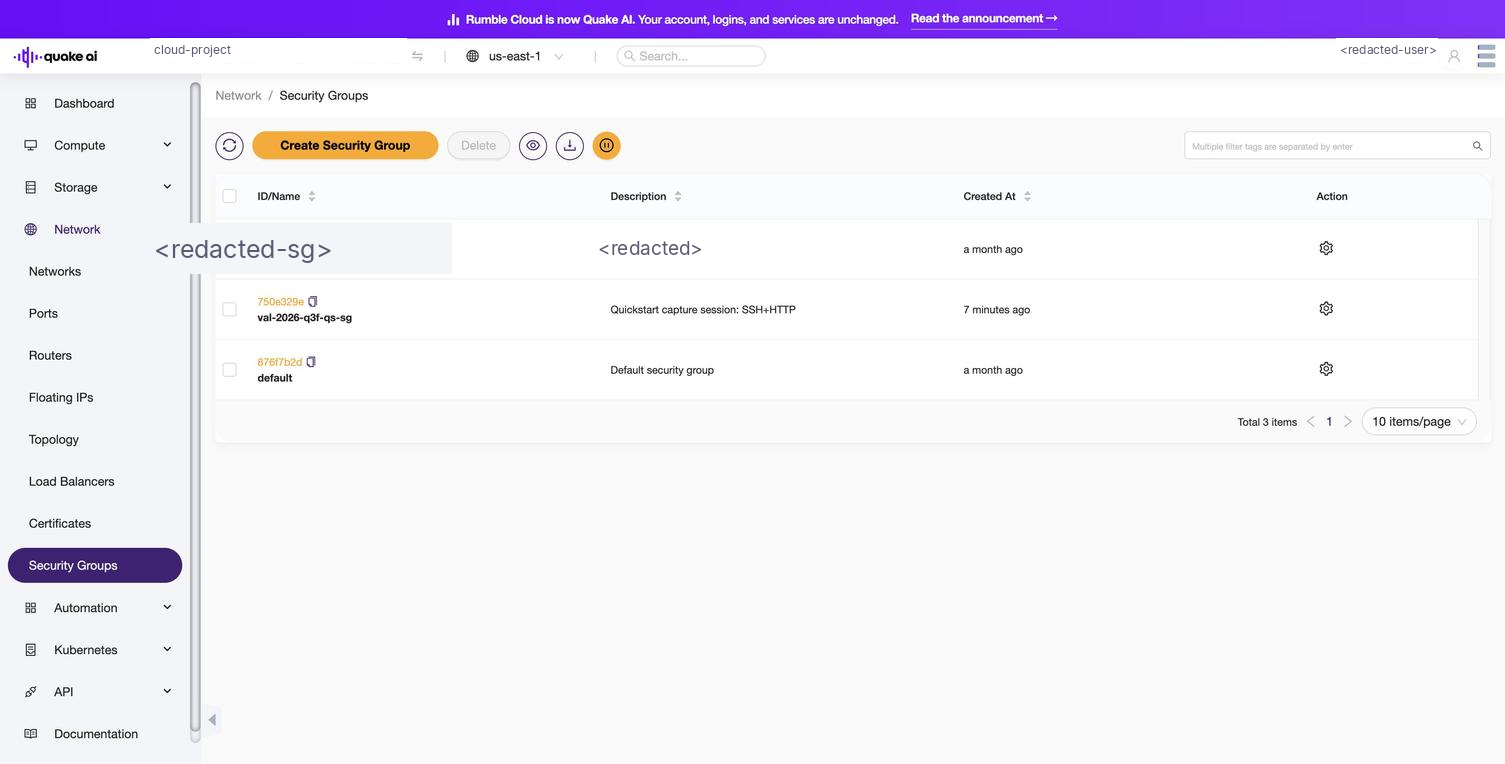
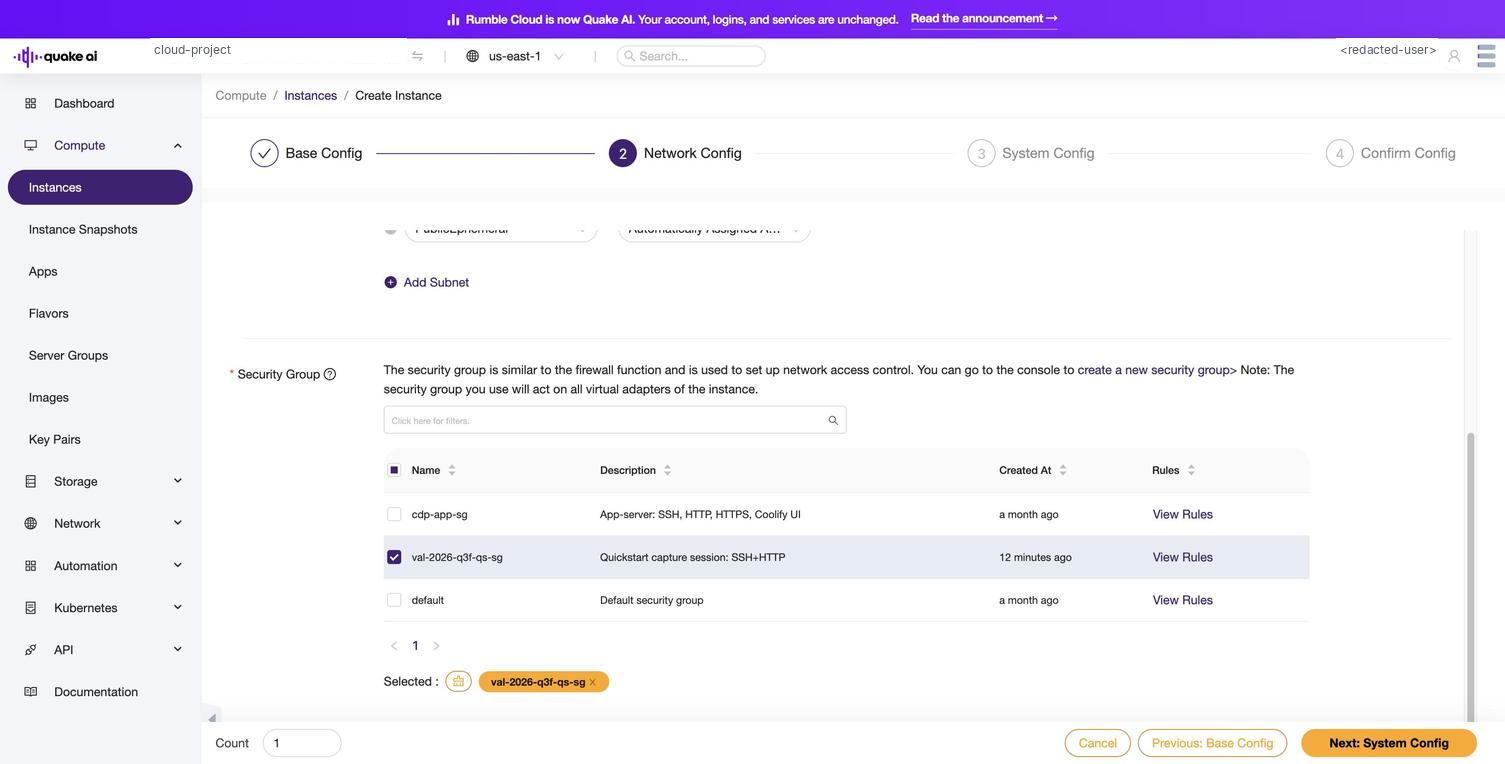
A security group is a virtual firewall attached to your instance's network port. Each rule allows specific inbound (ingress) or outbound (egress) traffic by protocol, port range, and source address. Every project includes a default security group that allows traffic only between its own members, so an instance using only default is unreachable from the internet. Create a dedicated group that opens TCP port 22 (SSH) and TCP port 80 (HTTP), then select it instead of default when you launch the server in step 3. See Security groups for more.
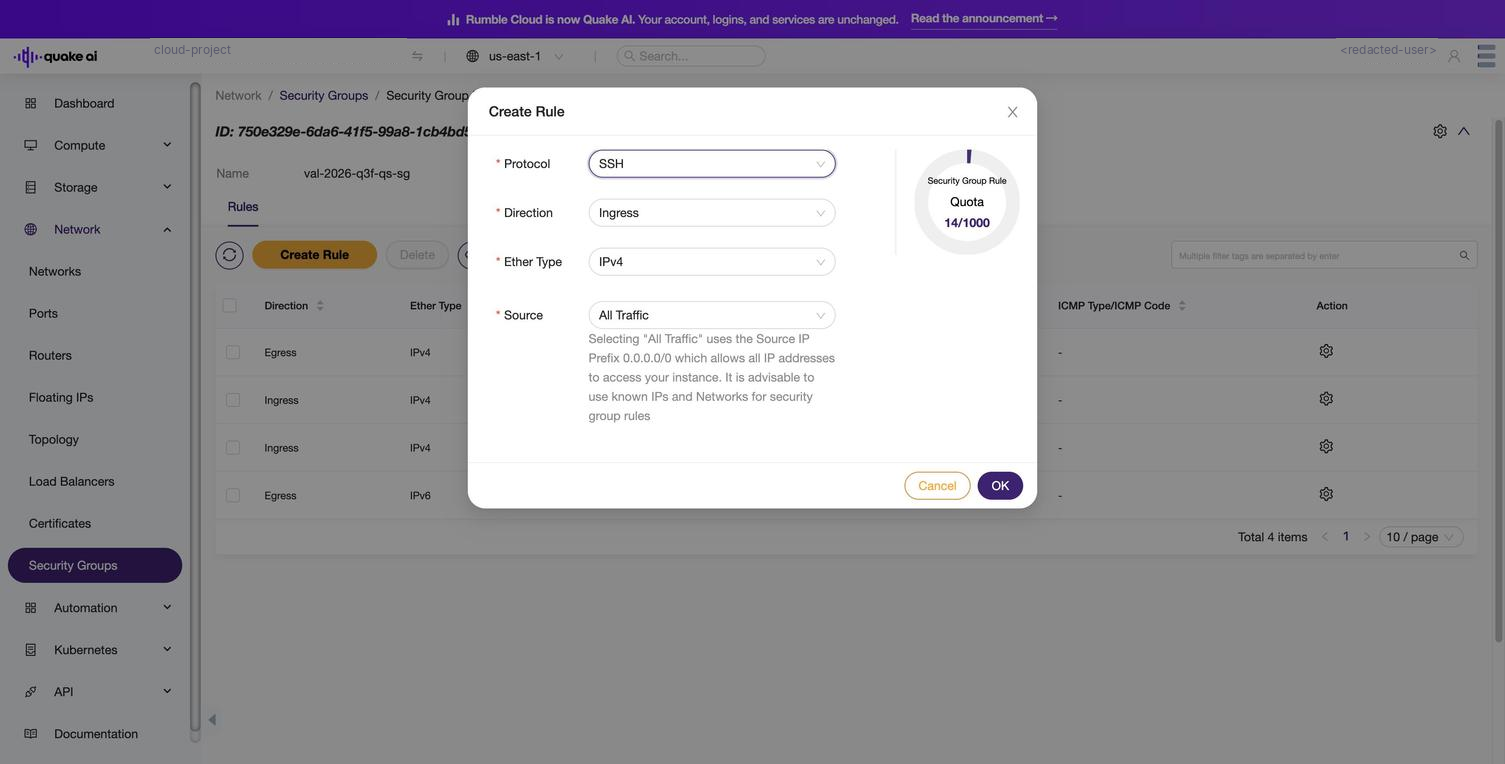
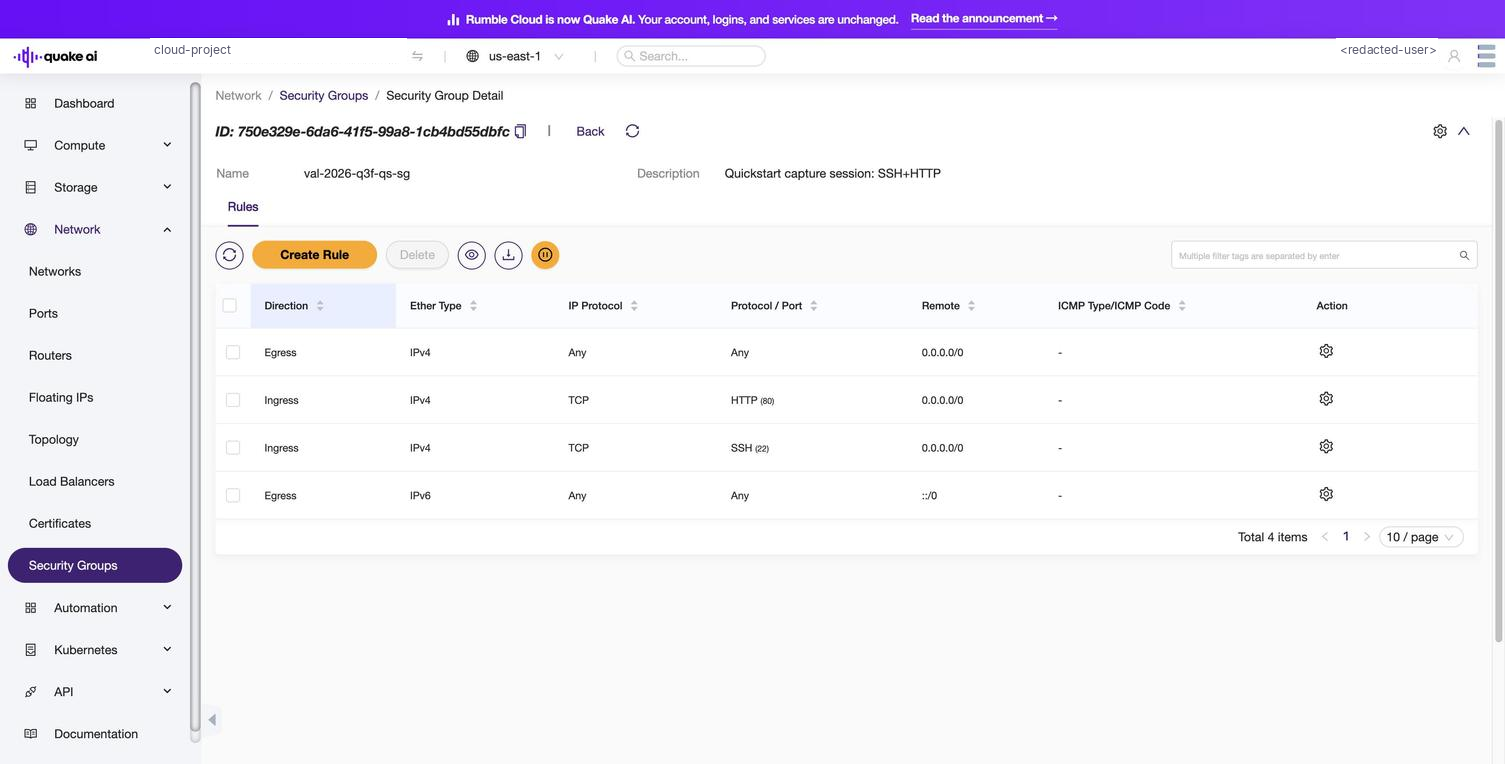
For production, restrict the SSH rule's Source (CLI flag --remote-ip) to your workstation's public address instead of leaving the default All Traffic (0.0.0.0/0). Port 80 stays open to the internet because you're running a public web server.
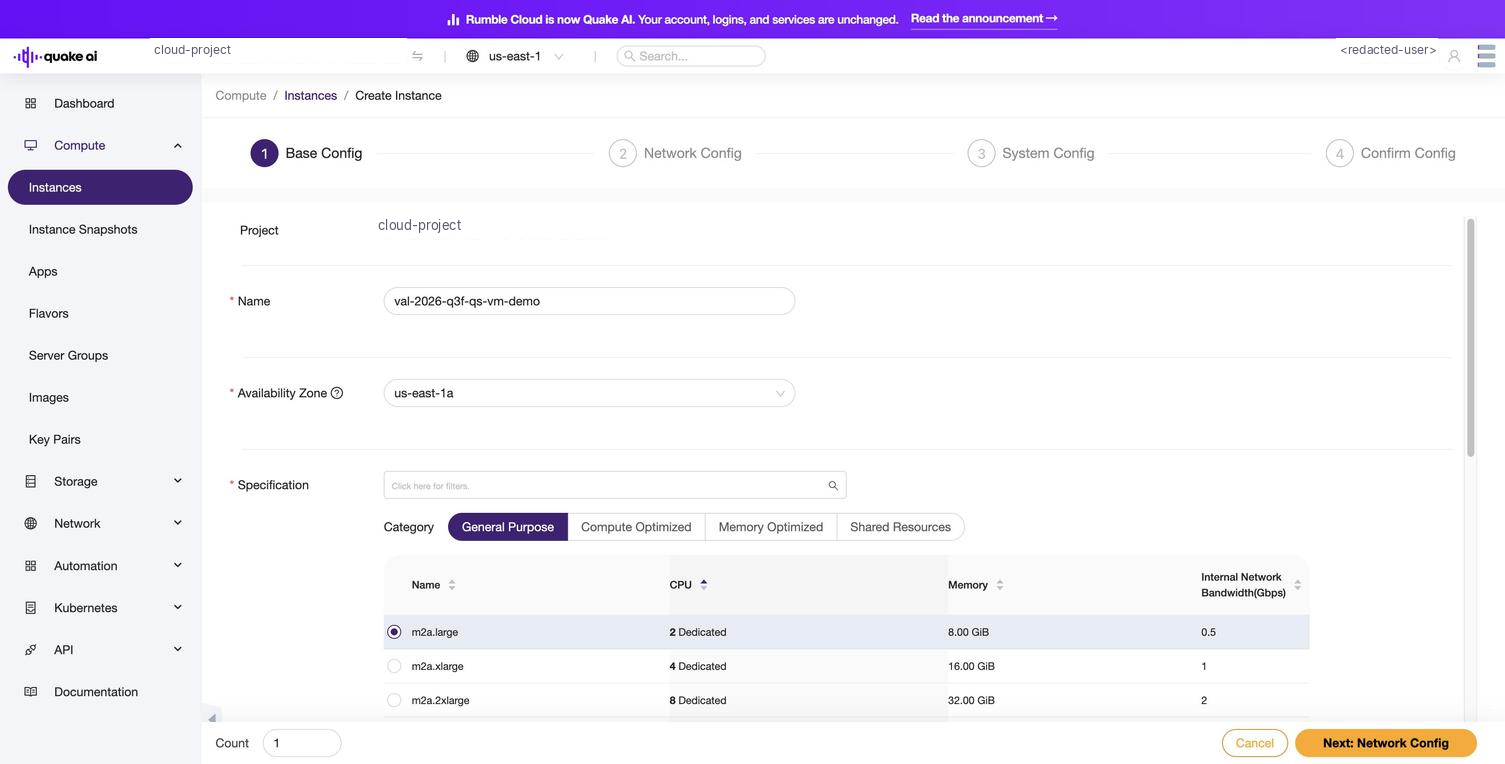
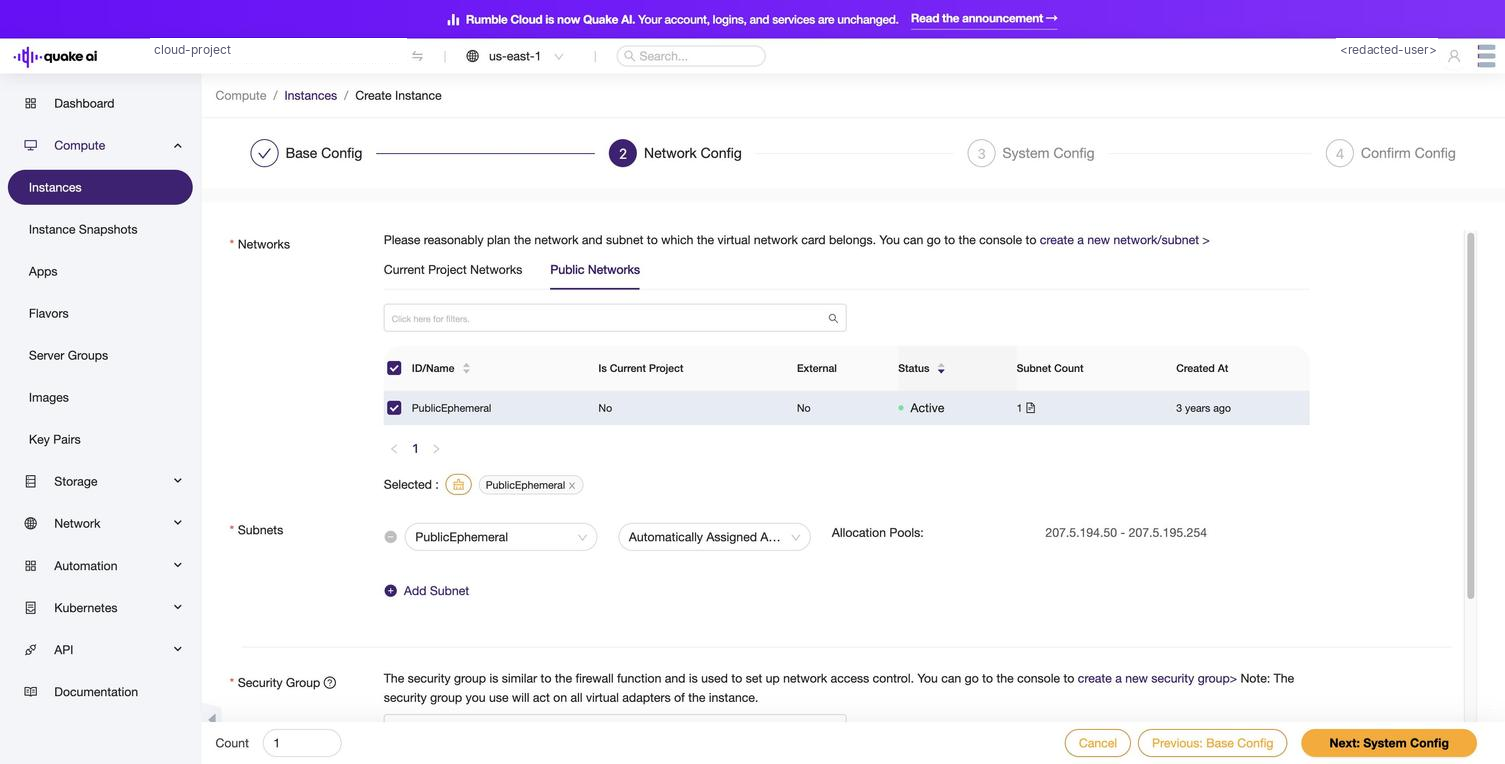
3. Launch your first server#
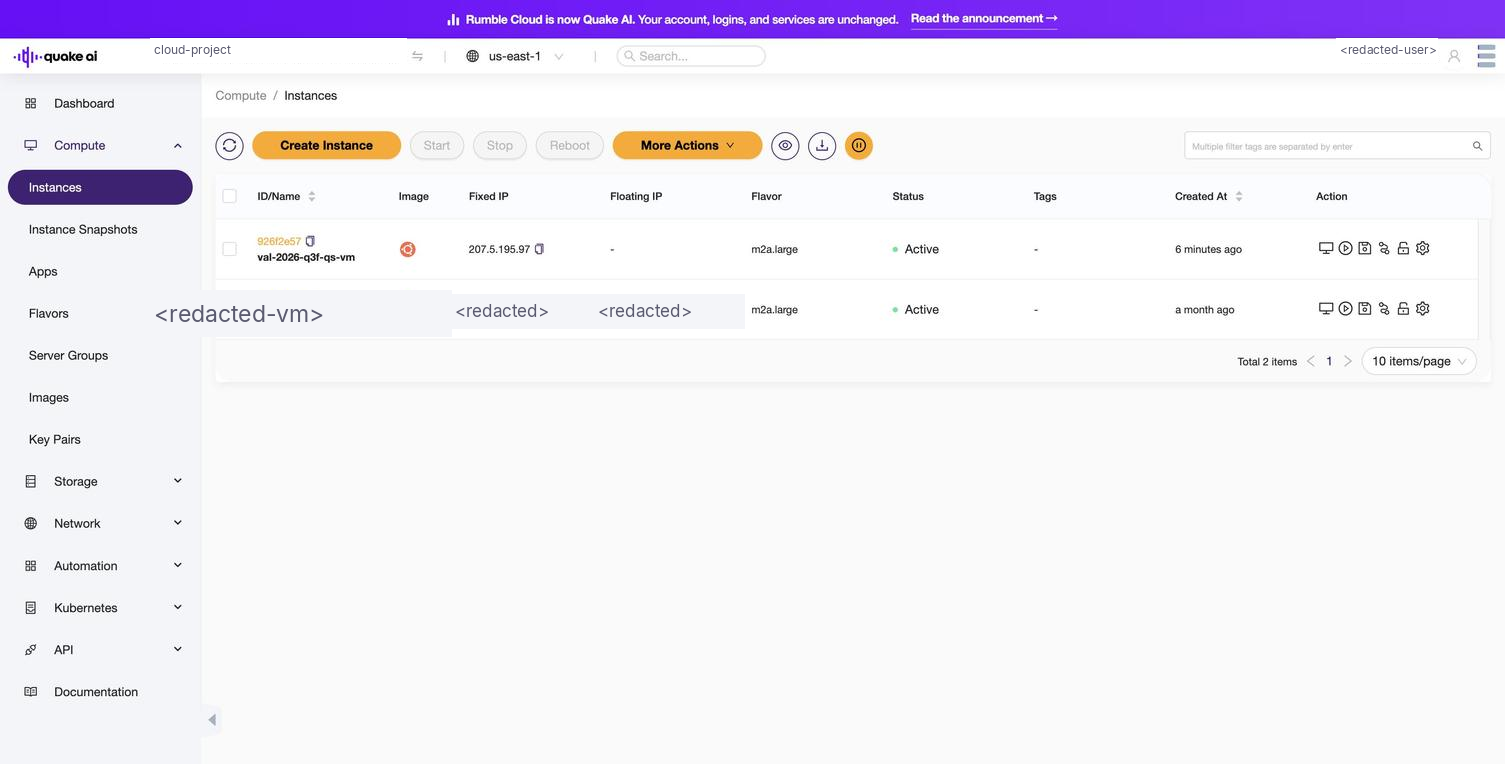
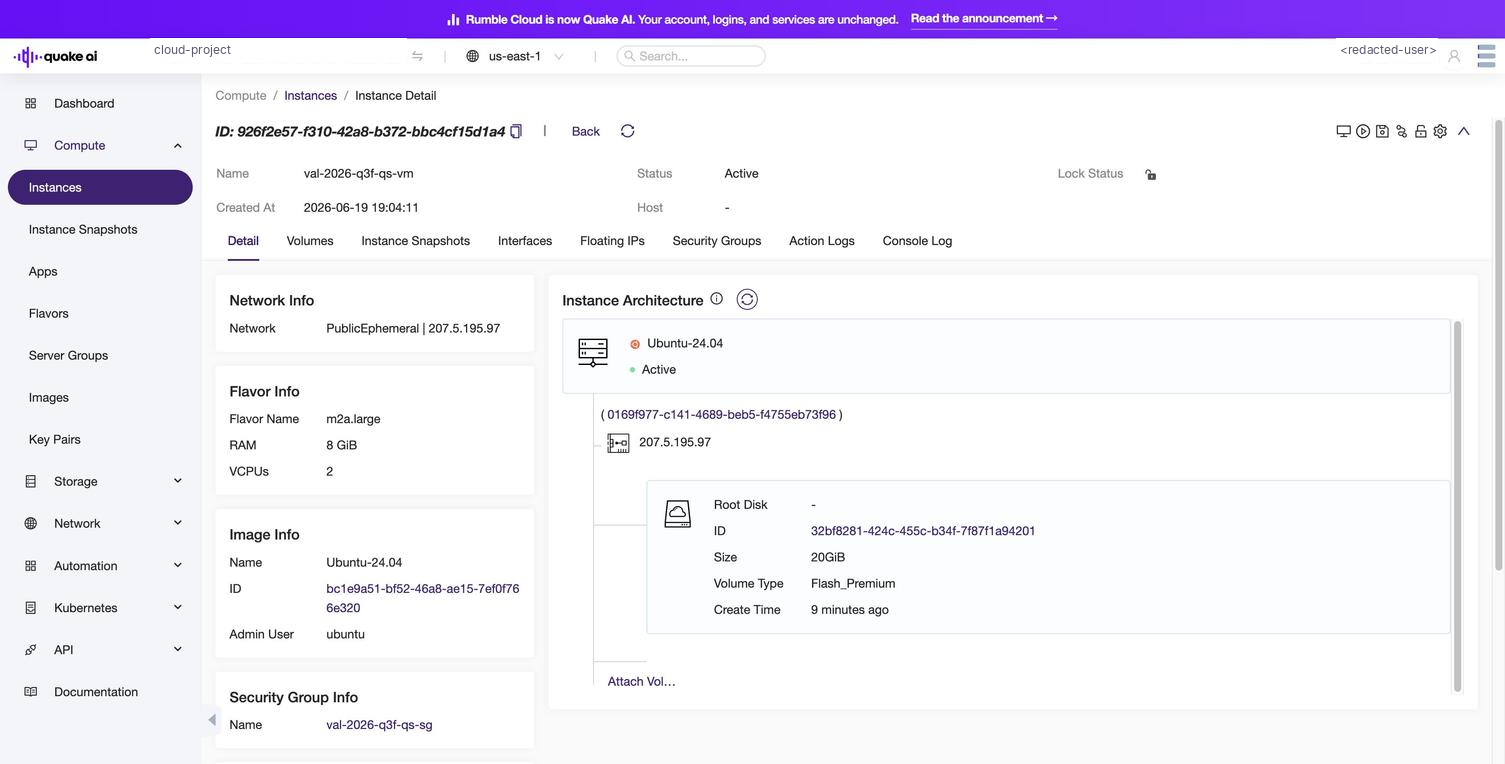
Launch a virtual machine on the PublicEphemeral network. Instances on this network receive a public IP directly, so SSH and HTTP work as soon as the instance reaches Active status.
4. Serve a page#
You are logged in to web-01 as ubuntu over SSH. Install nginx, write a page, and visit it from your browser.
Install nginx:
sudo apt update
sudo apt install -y nginx
Ubuntu starts nginx automatically. nginx is already serving its default welcome page on port 80.
Replace the default page with your own greeting (substitute your name):
echo '<h1>Hello from Alex on Quake AI</h1>' | sudo tee /var/www/html/index.html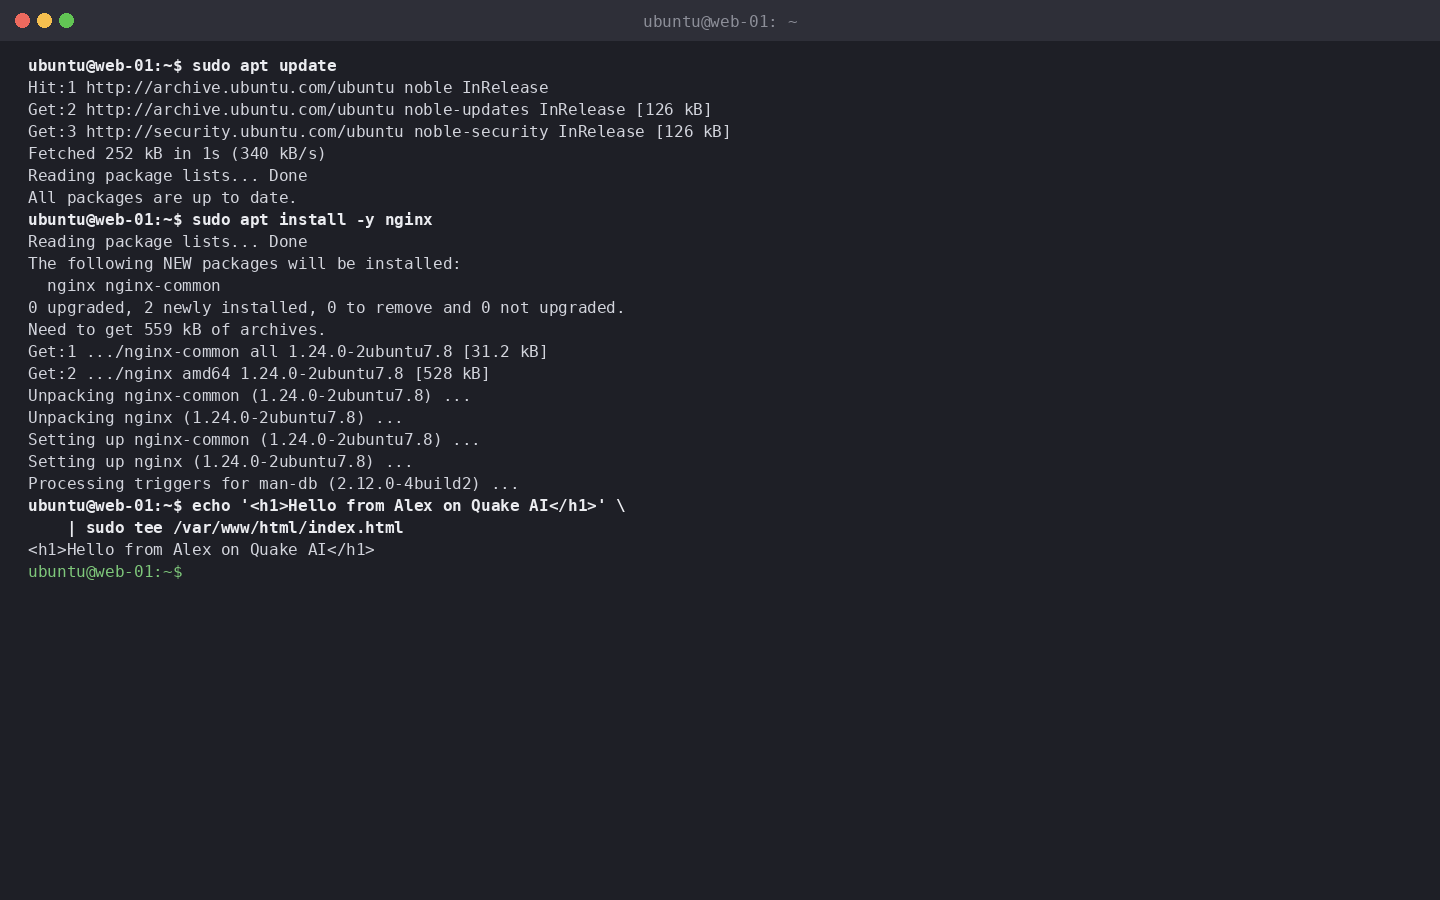 Click to zoom
Open http://INSTANCE_IP in your browser (substitute the public IP you used to SSH in). The greeting renders. nginx is serving the page from the Quake AI VM you provisioned and configured in this walkthrough.
To publish the same site on a domain you own, point your domain at the instance's public address before you add TLS with Let's Encrypt or a CDN in front.
Disconnect from the server:
exit5. Clean up#
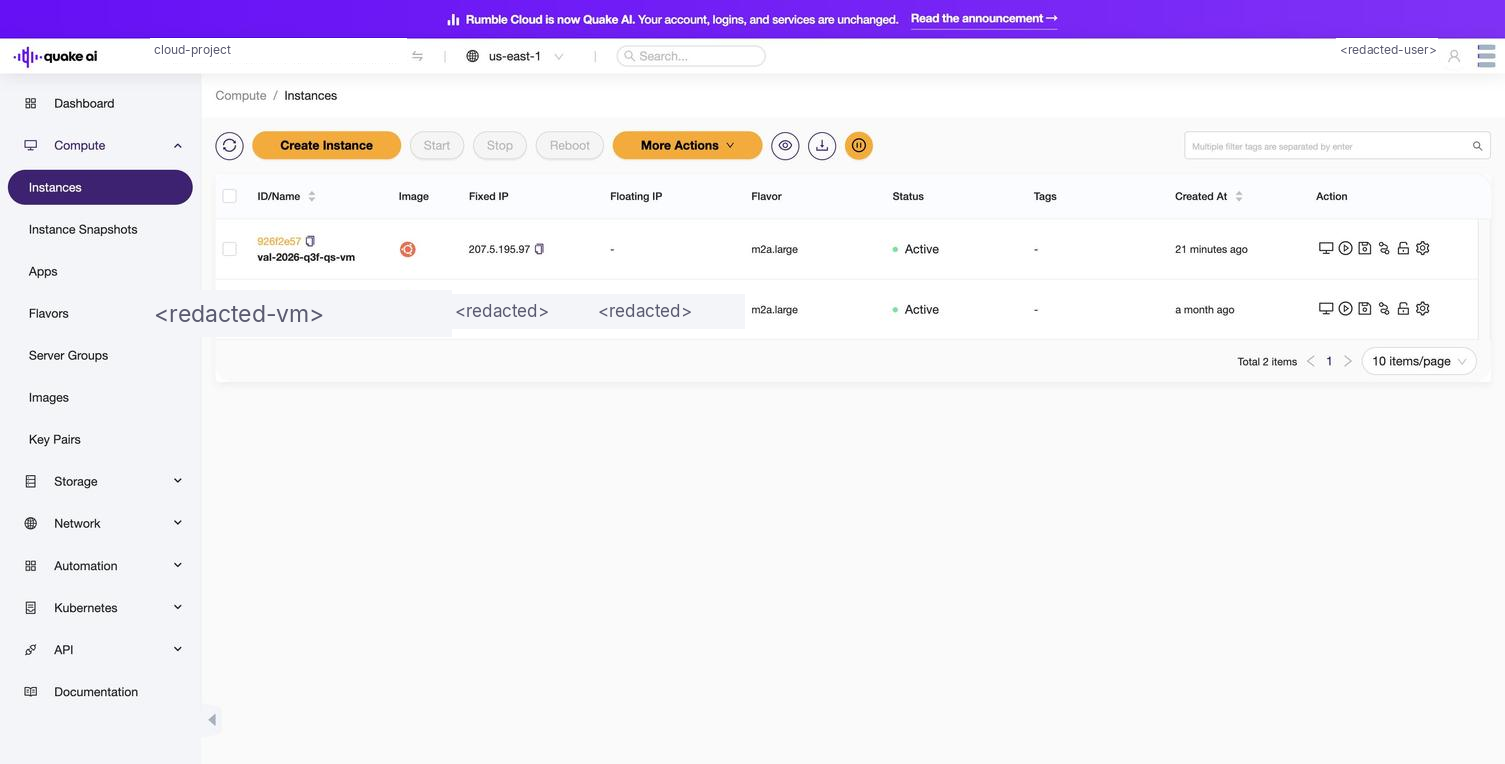
A public web server should not run unattended. Delete the instance now that you have seen the page. You can reuse the SSH key (my-laptop) and the security group (web-access); leave them in place for the next server you launch.
You provisioned a public web server, viewed it in a browser, and deleted it. The same workflow extends to more complex projects: more instances, custom images, automation, self-managed reverse proxies, Kubernetes clusters. Where to go next:
- How to point a domain at a Quake AI resource: map a hostname at your registrar to a floating IP or public address.
- How to issue and auto-renew a TLS certificate with Let's Encrypt: HTTPS on the VM you built.
- How to put a CDN in front of a Quake AI workload: cache static assets at the edge after DNS is set.
- Compute concepts: instances, flavors, images, and how the platform models them.
- Quickstart learning paths: static sites, databases, containerized apps, object storage, and infrastructure as code.
- Access & Credentials: full CLI setup, app credentials, API tokens, and credential rotation.
- Automation how-tos: IaC patterns, CI integration, and template usage.
- Platform overview: what Quake AI is, what it runs on, and how it differs from other providers.
Usage Guidelines
The sample code, software libraries, command line tools, proofs of concept, templates, and other related technology on this page (including any of the foregoing that is provided by Quake AI personnel) is provided to you as Quake AI Content under the Quake AI Customer Agreement, or the relevant written agreement between you and Quake AI (whichever applies). Do not use this Quake AI Content in your production accounts, or on production or other critical data. You are responsible for testing, securing, and optimizing the Quake AI Content (such as sample code) as appropriate for production grade use based on your specific quality control practices and standards. Deploying Quake AI Content may incur Quake AI charges for creating or using Quake AI chargeable resources, such as running Compute instances or storing data in Object Storage. Your use is also subject to the Acceptable Use Policy.
For the full policy, see Usage Guidelines.
Last validated: 07.07.2026